
So, picture this: it's December, the house is half chaos, I'm already covered in flour for a reason I can't quite remember, and I've got a handful of half-used bags of everything from M&Ms to dried cranberries rattling around my pantry. That's when—almost every year—I decide it's officially "Christmas Kitchen Sink Cookie" time. I mean, it's almost like my mom's holiday baking, but with way more organized chaos, less logic, and (possibly) more chocolate chips. That old family joke about baking being 'hungry jazz' definitely applies here.
Why You'll Love This One, Probably More Than You Expect
I make this when guests pop in unexpectedly or when I've meant to make proper gingerbread but, well, time just nipped out the back door. My family goes wild for these, especially since there's always something new chucked in (last year, leftover chopped fudge—truly wild). Plus, these are my answer for when I can't face another batch of perfectly iced sugar cookies. Out of anything? Throw it in. Sometimes that backfires—ahem, don't try minty cough drops; just trust me here. But most times? Big win. And if for some reason the dough looks odd at first, that's part of the journey. It...works itself out. Usually.
The Assembly Line: Ingredients (But Make It Flexible)
- 1 cup (225g or, let’s be real, two solid big handfuls) salted butter, at room temp (I use unsalted with a pinch more salt if that's all I've got—nobody's judging)
- 1 cup brown sugar, packed (my gran swore by dark brown, but I grab whatever isn’t completely stuck together—light works too)
- ½ cup white sugar (or more brown if I’m low—honestly, you sometimes can't tell)
- 2 big eggs
- 2 teaspoons vanilla extract (bargain stuff or the good stuff—depends what’s left)
- 2 and ½ cups all-purpose flour (I sometimes sneak in a quarter cup of oats when I'm feeling rustic)
- 1 teaspoon baking soda
- ½ teaspoon salt (skip if you used salted butter)
- 1 cup chocolate chips (any kind—mix them up if you dare. Once I did half peanut butter chips, half dark chocolate. Good times)
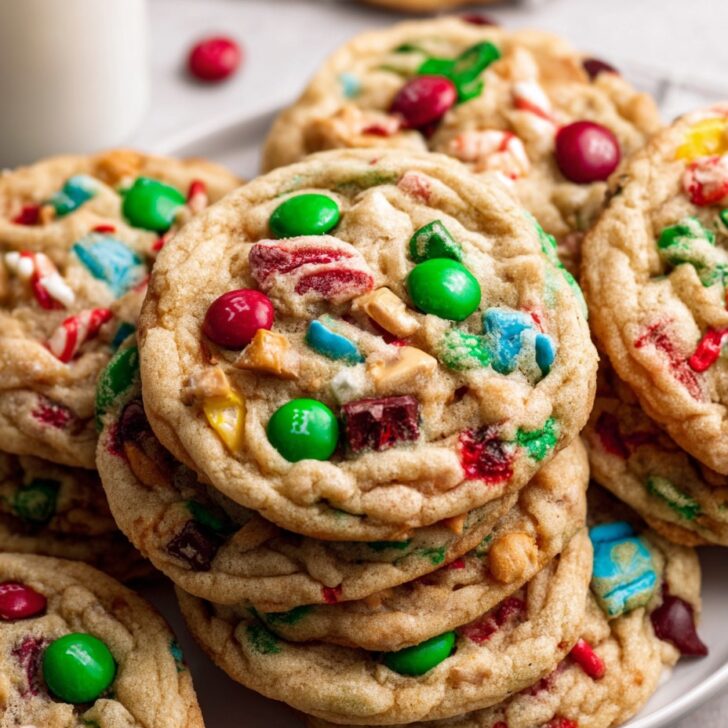
- 1 cup Christmas-colored M&Ms or smarties (not essential, but very festive)
- ¾ cup chopped walnuts or pecans (unless you're nut-averse, in which case extra chocolate is never wrong)
- ½ cup shredded coconut or toffee bits (or both, if you're feeling cheeky)
- ¾ cup dried cranberries, cherries, or... you know, whatever dried fruit you like/have
- OPTIONAL: A small handful of pretzel bits, mini marshmallows, or chopped up caramels (when the mood strikes)
Let's Get into the Messy Magic: Directions
- Crank your oven to 350°F (175°C)—I always set a timer because, truthfully, I've forgotten until things start to smell "done" in a bad way.
- Line a couple of baking trays with parchment paper. If you’re out, just grease them. Or use one tray and keep rotating; it's not glamorous, but it works.
- In your biggest bowl, beat the butter and both sugars together until it looks like really fluffy sand (this is where, if I'm honest, I sometimes lose patience and stop early, but when I do give it a few extra minutes it's always softer). Electric mixer is great, but elbow grease and a sturdy spoon is how I started.
- Veg in for the eggs, vanilla, and give it a solid mix until there’s no weird streaky egg bits. It shouldn’t look like cottage cheese. If it does, let it come to room temp more, or just soldier on!
- Whisk together flour, baking soda, and salt (I admit, I’ve dumped it all in together when lazy—still edible).
- Combine wet and dry ingredients. Do it gently so you don't get flour everywhere—though every year I still manage to create a dust cloud.
- Add in all your mix-ins: chips, nuts, the whole parade. Don't be shy (except with marshmallows—they can melt and turn gooey, but in a nostalgic Rice Krispies sort of way, not a disaster). I usually sneak a bit of dough here. No shame.
- Drop spoonfuls (I do "golf ball" size, but any way the wind blows) about 2 inches apart. If things stick, wet your hands or just use a couple of spoons.
- Bake 10–12 minutes. You want edges just golden, middles soft. Don’t panic if they seem too underdone; they finish on the tray. I learned that after a few years of rock-hard cookies.
- Let them cool on the tray for a few mins, then move to racks (if you have them—otherwise, any clean-ish surface will do, like the back of a baking sheet).
Random Notes, Straight from the Kitchen Trenches
- If your dough is super sticky, a quick 15-min trip in the fridge helps a lot.
- The colors can bleed a bit with certain candies, but that's just...character.
- Once, I grated a tiny bit of orange zest in—gave it a proper Christmassy zing.
- You’ll probably burn your tongue if you try one too soon. I still do this every time.
- Actually, after a few days, the flavors meld and these taste even better, if they last that long.
Variations: Experiments, Including That One Disaster
I’ve swapped the dried cherries for chopped dates once—honestly, amazing. Coconut’s always polarizing, so leave it out if you like (I do this for picky eaters). Once tried stuffing a candy cane chunk in the middle—big mistake. Tasted like toothpaste, and not in a fun way.
I've tried browning the butter (great in theory, but you have to chill it back to proper temp. Too fussy, and I always forget.) You could even go vegan—sub in margarine and egg replacer, as long as you’re braced for a slightly different texture.
What if You Lack Fancy Gear?
Let me state the obvious: a stand mixer is fab for tired arms, but a bowl and wooden spoon will get you there. Lining the tray is certainly nice, but in a pinch—I've just greased an old cookie sheet. Works. And as for cooling racks? I've used the top of my toaster before. Seems mad, but it does in a bind.


Storage—If These Last Long Enough
Technically, you can keep these in an airtight box up to a week, but in my house, leftovers are an urban myth. Fridge? They're fine, but warm them a little before eating. You can freeze balls of raw dough to bake later—something I learned here after too many years of wasted dough. Or pop baked cookies in freezer bags for emergencies (like, you know, Tuesday?).
How We Serve These (Family Traditions and All That)
I always toss a handful onto a big colourful plate for Christmas movie night, right next to the mugs of hot chocolate. My little one always sneaks a cookie for Santa (followed by an elaborate debate about how many he really needs). They're also brilliant for gifting—just maybe wrap them before the dog gets any clever ideas.
Actually Useful Pro Tips (Learned the Hard Way)
- I once tried melting the butter thinking it would save time—ended up with greasy, flat cookies. Don’t.
- Too many marshmallows can make sticky, lava-like puddles—stick to a few, tucked well in the dough.
- If you double the recipe, switch up the pans halfway through. Otherwise, top tray gets all the glory.
- Tried skipping chill time on a hot day and, honestly, should have waited. Patience is not a virtue I always possess.
Questions People Actually Ask Me About These
- Can I make these gluten-free?
- I've subbed in a 1-to-1 GF flour before and no one even noticed. You might need to add a bit more if it's too wet; flour varies.
- What do I do if my dough is too dry?
- Sprinkle in a bit of milk (start with a tablespoon). It shouldn't be like bread dough, more like thick, scoopable mud.
- Can I use less sugar?
- Probably! I’ve dropped it to just under 1 cup total before—still good, maybe more like a breakfast cookie, ha.
- They look too pale... should I bake longer?
- They'll firm up as they cool! But if you like crisper cookies, add 2–3 mins. Just watch the bottoms so they don't go dark too fast.
- Where'd you get those wild candies?
- Honestly, random supermarket raids or those seasonal multi-packs. I love checking out bulk sweets shops for surprises, too.
And if you want some more Christmas baking chaos (or just like a food laugh), here's a funny round-up that inspires most of my holiday failures: cookie mishaps.
Honestly, just get in there and bake—it's about the laughs as much as the cookies. And trust me, even the "mistakes" are pretty tasty.


Ingredients
- 2 ¼ cups all-purpose flour
- 1 teaspoon baking soda
- ½ teaspoon salt
- 1 cup unsalted butter, softened
- 1 cup brown sugar, packed
- ½ cup granulated sugar
- 2 large eggs
- 2 teaspoons vanilla extract
- 1 ½ cups semi-sweet chocolate chips
- 1 cup red and green holiday M&Ms
- ½ cup chopped pretzels
- ½ cup chopped pecans
- ½ cup shredded sweetened coconut
Instructions
-
1Preheat the oven to 350°F (175°C) and line baking sheets with parchment paper.
-
2In a medium bowl, whisk together flour, baking soda, and salt. Set aside.
-
3Using a mixer, cream together the butter, brown sugar, and granulated sugar until light and fluffy. Beat in eggs one at a time, then stir in vanilla.
-
4Gradually mix in the dry ingredients until just combined. Fold in chocolate chips, M&Ms, pretzels, pecans, and coconut.
-
5Drop rounded spoonfuls of dough onto prepared baking sheets. Bake for 12-14 minutes until golden around the edges but still soft in the center.
-
6Cool cookies on baking sheets for 5 minutes, then transfer to wire racks to cool completely.
Approximate Information for One Serving
Nutrition Disclaimers
Number of total servings shown is approximate. Actual number of servings will depend on your preferred portion sizes.
Nutritional values shown are general guidelines and reflect information for 1 serving using the ingredients listed, not including any optional ingredients. Actual macros may vary slightly depending on specific brands and types of ingredients used.
To determine the weight of one serving, prepare the recipe as instructed. Weigh the finished recipe, then divide the weight of the finished recipe (not including the weight of the container the food is in) by the desired number of servings. Result will be the weight of one serving.
Did you make this recipe?
Please consider Pinning it!!