
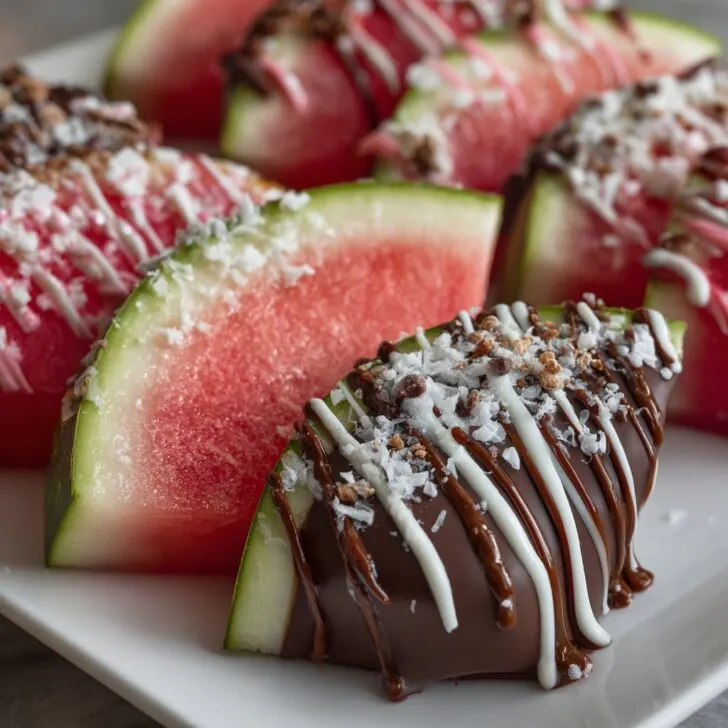
Let Me Tell You About Chocolate Dipped Watermelon Slices...
So, this one takes me right back to a summer picnic at my Aunt Sheila's place, where she insisted on bringing out her mysterious 'fancy dessert' in a giant old Tupperware. Spoiler: it was just watermelon slices, dunked in chocolate, sprinkled with sea salt, all stuck together like some wobbly fruit sculpture. Honestly, it looked ridiculous—tasted amazing though. Ever since, I've been riffing on her idea, and it’s become my go-to when the weather gets hot and I want to pretend I’m eating healthy because, well, there’s fruit. Also, if you have kids running around, this is the kind of thing that’ll make them think you’re the fun adult at the BBQ (even if you feel like a total fraud while you’re doing it).
Why You'll Love This—And Maybe Laugh A Bit
I make this when I forget to plan dessert or when I find a watermelon that's almost too ripe. My family goes absolutely bonkers for it (especially my brother, who claims he hates fruit, but will eat half a tray of these if you don't watch him). Sometimes I get a little fancy and drizzle dark chocolate across the slices like I’m on a baking show. Once, I tried white chocolate and it, uh, did not win any beauty contests (but the kids ate it anyway, so whatever). Plus, it’s basically impossible to mess up—unless you get distracted and burn the chocolate, which I have. More than once. Not my proudest moment!
What You'll Need: Ingredients (and My Two Cents)
- 1 small-ish watermelon (seedless makes life easier, but I’ve picked out seeds before and survived)
- 200g good dark chocolate (sometimes I just use chocolate chips if that’s all I’ve got—my grandma swore by Ghirardelli, but honestly Aldi’s own is decent)
- 1–2 teaspoon coconut oil or butter (makes the chocolate smoother—skip it if you’re out, but it gets a bit clumpy)
- Sea salt flakes (completely optional, but if you haven’t tried it, you’re missing out)
- Crushed pistachios, sprinkles, or even toasted coconut for topping (or just leave them plain—no one will riot)
How To: Directions (With a Few Detours)
- Slice your watermelon into wedges—about an inch thick works best. Or thinner, if you’re trying to make them last. I once tried cubes, but the chocolate dripped everywhere. Not worth it.
- Melt your chocolate. I usually do it in the microwave in 30-second bursts, stirring each time (because that one time I left it for a full minute, it turned into a weird chocolate brick). You can also use a double boiler if you’re feeling posh, but honestly, the microwave works fine.
- Stir coconut oil or butter into the melted chocolate until it looks glossy. This is where I start getting hungry. I sometimes sneak a spoonful here—just don’t tell anyone.
- Now, line a baking sheet with parchment paper (or foil if you’re out—just don’t use wax paper unless you enjoy peeling wax bits off chocolate). Dip each watermelon slice about halfway into the chocolate, then lay it flat on the tray.
- Sprinkle with sea salt, nuts, or whatever else you fancy. Or nothing. It’s your call.
- Pop the tray in the fridge for about 20 minutes, or until the chocolate sets. Sometimes I get impatient and check after 10. Don’t do that—the chocolate will still be gooey, and you’ll end up with messy hands (not that I mind, but you might).
Stuff I Learned (the Hard Way)
- Watermelon is very juicy. Pat the slices dry with paper towels before dipping, or the chocolate will slide right off. I used to skip this step, but now I know better.
- If your kitchen is hot, chocolate takes longer to set. Sometimes I shove everything in the freezer, but leave it too long and the watermelon turns weirdly icy. Not my favorite mistake.
- Chocolate blooms if you leave it open in the fridge—just cover the tray loosely with plastic wrap if you want it to look nice.
Experiments & Mishaps—Variations I’ve Tried
- White chocolate + freeze-dried raspberries: Looks Instagrammable, tastes a bit sweet for me. But it’s a crowd pleaser.
- Milk chocolate + chili flakes: Actually works! Subtle heat. Though, don’t overdo it. Learned that (the hard way).
- Peanut butter swirl in the chocolate: Sounds good, right? It gets messy and weird. Save your peanut butter for toast.
Do You Need Fancy Equipment? (Short answer: No)
I use a big chopping board and a sharp-ish knife—nothing fancy. If you don’t have parchment, just use foil, or even a clean tea towel under the slices while you dip. Actually, I once lined the tray with a plastic bag in a pinch. Wouldn’t recommend, but desperate times...


How To Store (If You Have Any Left)
Just keep them in the fridge, on a plate or in a container (with a bit of parchment, so they don’t stick). They’re best the day you make them. Though, honestly, in my house they never last more than a day! If you forget and leave them out, the chocolate gets a bit melty, but still tastes fine—just a bit messier.
Serving Them Up—My Way
I like to pile them up on a big platter and let people grab what they want. Sometimes, for a little razzle-dazzle, I’ll scatter fresh mint leaves over the whole lot. My cousin insists they taste best with a scoop of vanilla ice cream on the side. Who am I to argue?
Pro Tips (a.k.a. Stuff I Messed Up)
- Don’t rush the chilling—if you try to eat them before the chocolate sets, you’ll end up with chocolate on your elbows. Ask me how I know.
- If you accidentally use salted butter instead of coconut oil, it’s not the end of the world. Actually, I think it tastes better (but I might be biased).
- Don’t stack them until the chocolate is fully firm, or you’ll have a sticky pile. Not as cute as it sounds.
FAQ—You Asked, I Answered
- Can I use other fruit? Yeah, totally. Strawberries or pineapple work a treat. Bananas, not so much—they go mushy. Ask me how I know!
- Is it okay to use regular chocolate bars? Absolutely. I’ve even used up old Easter eggs (chocolate is chocolate, right?).
- How do I stop the chocolate from cracking? Well, that’s tricky. Try not to make the chocolate layer too thick—and don’t freeze them. Or just embrace the cracks; they still taste great.
- Can I make these vegan? Easy—use dairy-free chocolate and skip the butter. Coconut oil does the trick. I’ve done it loads of times.
- What should I do if my chocolate seizes? Gah, I hate when this happens. Sometimes adding a splash of warm milk (or even water) helps, but honestly, if it’s a goner, just start again. Happens to the best of us.
Oh! If you’re looking for more fruity summer desserts, this watermelon salad is a winner, and for chocolate melting tips, Sally's Baking Addiction has a whole guide—saved me more than once.
Final thought before I forget: if your first batch looks a bit rough around the edges, congratulations, you’re making them right. It’s all part of the charm!


Ingredients
- 1 small seedless watermelon
- 200 g dark chocolate chips
- 1 tablespoon coconut oil
- 2 tablespoons chopped pistachios
- 2 tablespoons chopped almonds
- 2 tablespoons shredded coconut
- 1 tablespoon sea salt flakes
- Parchment paper for lining
Instructions
-
1Slice the watermelon into 1-inch thick wedges and pat them dry with paper towels.
-
2In a microwave-safe bowl, combine dark chocolate chips and coconut oil. Microwave in 30-second intervals, stirring until smooth and fully melted.
-
3Dip each watermelon slice halfway into the melted chocolate, allowing excess to drip off.
-
4Place the dipped slices on a parchment-lined tray. Sprinkle with chopped pistachios, almonds, shredded coconut, and sea salt flakes while the chocolate is still wet.
-
5Refrigerate the tray for about 10 minutes or until the chocolate is set. Serve chilled.
Approximate Information for One Serving
Nutrition Disclaimers
Number of total servings shown is approximate. Actual number of servings will depend on your preferred portion sizes.
Nutritional values shown are general guidelines and reflect information for 1 serving using the ingredients listed, not including any optional ingredients. Actual macros may vary slightly depending on specific brands and types of ingredients used.
To determine the weight of one serving, prepare the recipe as instructed. Weigh the finished recipe, then divide the weight of the finished recipe (not including the weight of the container the food is in) by the desired number of servings. Result will be the weight of one serving.
Did you make this recipe?
Please consider Pinning it!!