
Let Me Tell You About These Little Beauties…
Alright, friend, settle in for a wild (okay, not that wild) ride through my kitchen. I first tried making these chocolate chip cookie dough cups after a particularly disastrous attempt at regular cookies, and honestly? I haven't looked back. I mean, why bake when you can eat the best part straight from the bowl—except here you don't have to admit it to anyone because, well, it's actually a recipe. (Also, if you've got kids, there's a good chance they'll "help" but mostly just sample at each stage. I speak from experience!)
Why You'll Genuinely Love These
I make these whenever someone's having a hard week or we need something fun for movie night; my partner honestly loses the plot when they see the mixing bowl come out. If you’re anything like us, you'll devour them before they're even "properly" set. I swear every time I'll pace myself, and yet... Also, no oven needed—so in summer that's a small miracle. (I did try hiding a stash in the veggie drawer once. It totally didn't work. They got found in, like, an hour.)
Here's What Goes In (Don't Stress Substitutions)
- ¾ cup (170g) unsalted butter, softened – okay, I've used salted in a pinch, just skip a little added salt
- ¾ cup (150g) brown sugar – light or dark works, or even coconut sugar if you’re fancy
- ¼ cup (50g) white sugar – honestly you could just up the brown sugar instead, won’t change much
- 1 and ½ cups (190g) all-purpose flour – I usually heat treat it (see notes), but my sister flat-out never bothers
- 2 tablespoon milk – any milk, even almond or oat, but grandma would've only used cow's, you know?
- ½ teaspoon pure vanilla extract – sometimes I forget and it's still fine
- ½ teaspoon salt
- 1 cup (170g) mini chocolate chips – if all you’ve got are regular, just give 'em a rough chop
- 200g (about 7oz) good-quality baking chocolate (for melting)
How To Make These (Honestly, It’s Easier Than It Looks)
- Melt your chocolate. Grab a microwave-safe bowl; heat the chocolate in 30-second blasts, stirring every time, until smooth. Or do it over a little pot of simmering water if you’re feeling fancy. (I've burnt chocolate in the microwave before; still ate it though, so...)
- Line your muffin tin. Use a mini or regular one, doesn't matter. Paper liners make your life easier but I’ve been known to just spray with a bit of oil. Pour a spoonful of melted chocolate into each cup, tilt them around to coat the sides, then tap out excess. Put the tin in your freezer so the chocolate sets. Might take, I dunno, 10 minutes? Unless you forget and get sucked into social media like I usually do.
- Make the dough. In a big bowl, beat together the butter, brown sugar, and white sugar until creamy (I usually let my mixer do the work but a wooden spoon works and is more satisfying, or so my gran would tell you). Mix in milk and vanilla.
- Deal with the flour. Technically you should zap it in the microwave for about 1.5 minutes to kill any nasties, or pop it in a hot oven for 5 mins. My aunt skips this and is still alive. Up to you. Add flour and salt to the bowl; stir (it’ll look crumbly but keep going) and then add in chocolate chips. This is the stage when I always take a wee taste. For science.
- Press the dough in. Grab little blobs of dough and roll into balls (golf ball-ish). Press into the now-set chocolate cups, leaving a few millimeters at the top for a chocolate lid. Don't worry if it's a bit wonky; nobody's grading you.
- Top with more chocolate. Spoon over the rest of the melted chocolate to seal up the cups. Sometimes you have to re-melt it if it’s gone solid (seriously, it always happens to me – I just microwave it again). Back in the fridge or freezer till solid.
- Eat! Or, you know, wait and try to be civilized.
Stuff I’ve Learned (a.k.a. Notes)
- If your dough feels dry and won’t smoosh together, just splash in extra milk, like a teaspoon at a time. I used to overcompensate and, well, it got real gloopy... Oops.
- You don’t have to use mini chocolate chips, but you do need something small or it’ll get all lumpy. Ask me how I know.
- If you spill chocolate everywhere (I always do), just eat those bits. Perks of being the chef.
Variations I’ve Actually Tried (Not All Winners)
- Peanut butter swirl: Drop in half PB chips, but go easy—too many and it gets weirdly crumbly.
- Gluten free: Used almond flour once, tasted fine but texture a bit dense. If you need the real deal, I’d try this gluten-free dough recipe instead.
- Vegan: Swap in plant butter and nondairy milk, and vegan chocolate chips. Worked alright! The vegan baking site It Doesn’t Taste Like Chicken has some great ideas, actually.
- One time I tried stuffing them with caramel. Didn’t work, leaked everywhere, major kitchen carnage. Lesson learned!
What If You Don’t Have… (Equipment ~ Stuff)
Muffin tins are handy but honestly, I made these once in silicone cupcake molds I found at a car boot sale (yard sale for you yanks). Don’t have liners? You can just grease the pan and use a spoon to pop them out. No mixer? Elbow grease is character building, so my old neighbor claimed. Also, you don’t need any special chocolate—those chocolate bars at the bottom of the snack drawer will do.


Keeping Them Fresh-ish (Storage Tips)
So, technically you should keep these in an airtight tub in the fridge. They’ll last up to a week, I'm told—but honestly, in my house, two days is a minor miracle. If you want to stash them away from greedy hands, pop the container in the freezer and sneak one out when you need a fix. I think they taste even better a day later, though that's rare around here.
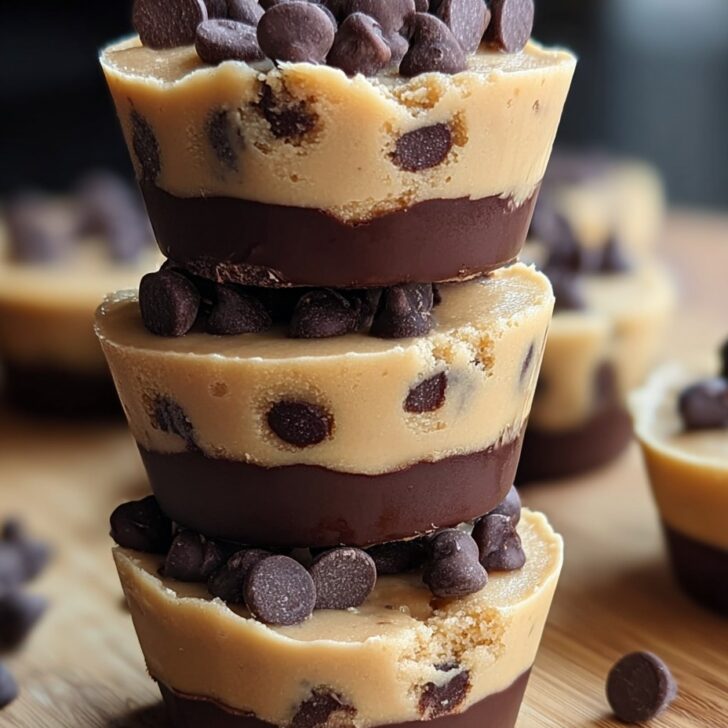
How We Like To Serve ‘Em (Sometimes with Tea, Sometimes for Breakfast)
You can pile these up on a plate or tiered stand (looks fancy for birthdays). Sometimes we chop them in halves and serve with ice cream—gets all melty and messy, which the kids adore. My weird uncle dips his in coffee. Works, I guess?
Pro Tips Form My Past Fails
- I once tried to rush the chocolate setting part and ended up with a soupy mess, so patience honestly helps here. Well, as much as I can muster.
- Keep the filling level a bit lower than the edges so the lid sits flat. I always forget and then smoosh it down, but taste-wise it’s fine anyway.
Actually Useful FAQs
- Can I make these ahead? Definitely—just keep them chilled. If you leave them out at a summer picnic, say, they’ll go soft quick, though.
- How about nut allergies? Just use nut-free chocolate and you’re grand. No worries there.
- Do I have to heat-treat the flour? I get asked this! Officially, yes, for food safety, but I’ve survived the odd shortcut. Your call.
- Whoa, that’s a lot of butter—can I use coconut oil? Yeah, you can, but the flavor will change a bit (not bad, just different)
- Help! My chocolate isn’t melting smoothly? Add a >tiny< drizzle of oil; any neutral oil works. Don’t use too much or you’ll end up with a greasy chocolate puddle. Trust me, I’ve done it.
Oh, before I forget—if you end up with a bit of leftover dough, it’s wonderful straight on a spoon (midnight snack anyone?). Maybe not the most proper finish to the recipe, but life’s short, innit?
For more random cookie wisdom, I like Sally's Baking Addiction—her tips saved my butt more than once.
Now, off you go. Make a mess, eat the dough. The best kitchen memories are always the messy ones anyway.


Ingredients
- 1 cup all-purpose flour (heat treated)
- ½ cup unsalted butter, softened
- ½ cup brown sugar, packed
- ¼ cup granulated sugar
- 2 tablespoons milk
- 1 teaspoon vanilla extract
- ½ teaspoon salt
- ¾ cup mini chocolate chips
- 2 cups semi-sweet chocolate chips (for coating)
Instructions
-
1Heat treat the flour by microwaving it for 1 minute and 15 seconds, stirring every 15 seconds, to kill any bacteria. Let cool completely.
-
2In a medium bowl, cream together the softened butter, brown sugar, and granulated sugar until light and fluffy.
-
3Add the milk, vanilla extract, and salt to the butter mixture. Mix until combined.
-
4Gradually mix in the cooled flour until a smooth dough forms, then fold in the mini chocolate chips.
-
5Melt the semi-sweet chocolate chips, then spoon a small amount into the bottom of each muffin cup and use the back of a spoon to coat the sides. Chill until set.
-
6Press a portion of cookie dough into each chocolate shell, then cover the tops with more melted chocolate. Chill until firm before serving.
Approximate Information for One Serving
Nutrition Disclaimers
Number of total servings shown is approximate. Actual number of servings will depend on your preferred portion sizes.
Nutritional values shown are general guidelines and reflect information for 1 serving using the ingredients listed, not including any optional ingredients. Actual macros may vary slightly depending on specific brands and types of ingredients used.
To determine the weight of one serving, prepare the recipe as instructed. Weigh the finished recipe, then divide the weight of the finished recipe (not including the weight of the container the food is in) by the desired number of servings. Result will be the weight of one serving.
Did you make this recipe?
Please consider Pinning it!!