
Let's Talk Chili—Pull Up a Chair
Okay, so here's the thing: I never intended to become the "chili person" in my friend group, but somehow, after one blustery winter night when I made this chili recipe with ground beef (pro tip: never let your friends go hungry during game night), suddenly everyone was asking for it. Funny enough, I totally winged it the first time—I’ll tell you, there may have been an incident with way too much chili powder. My kitchen smelled like a spice bazaar for a week, not that I’m complaining.
Why You'll Love This Chili (Or At Least, Why I Do)
I make this when it's cold out and I just want something warm and filling (and also when I've forgotten to meal prep because, well, who can keep up every week?). My family goes nuts for it because it's thick, a little spicy, and honestly, it’s kind of hard to mess up. The best part? It freezes well. So I always try to double up and stash some away...except it never lasts that long. Oh, and if you’re a fan of leftovers, I think this tastes even better the next day. (Once, I tried to make it with turkey instead—no one in my house let me live that down for months. So yeah, ground beef for the win!)
Gather Up These Ingredients (Substitutions Welcome!)
- 1.5 pounds ground beef (I've swapped in ground turkey when that's all I had—no one's favorite, but it works in a pinch)
- 1 large onion, chopped (yellow, white, honestly whatever's in the basket; my grandmother always insisted on sweet onions, but hey)
- 3 cloves garlic, minced (or a heaping spoonful of the jarred stuff if you're feeling lazy—no judgment)
- 1 bell pepper, diced (green is classic, but red or yellow adds a bit of sweetness)
- 2 cans (15 oz each) diced tomatoes, undrained
- 1 can (15 oz) kidney beans, drained and rinsed (black beans work too—I've done half and half before)
- 1 can (15 oz) pinto beans, drained and rinsed
- 2 tablespoons chili powder (I use the cheap store brand, but you can get fancy if you want)
- 1 teaspoon cumin
- 1 teaspoon paprika
- ½ teaspoon cayenne pepper (optional, for a kick—I usually go light here since my kids are wimps)
- Salt and pepper to taste
- 1 cup beef broth (I sometimes just use water with a bouillon cube—works fine!)
- 1 tablespoon olive oil or whatever oil you have
How I Actually Make This—Step by Step (Sort Of)
- Grab your biggest pot (or Dutch oven if you want to be fancy). Heat the oil over medium heat. Chuck in the chopped onion and bell pepper. Stir it around until they're soft and your kitchen smells all cozy—about 5 minutes or so.
- Add in the garlic. Give it a quick stir. Try not to walk away at this point because garlic burns fast (ask me how I know).
- Crank up the heat a bit and toss in the ground beef. Break it up with your spoon (I use a wooden one because it just feels right). Cook until it's browned all over. Don't stress about little bits sticking to the bottom; those are flavor nuggets.
- Alright, now dump in the diced tomatoes, both kinds of beans, chili powder, cumin, paprika, cayenne (if you're brave), salt, pepper, and that broth. Give everything a good stir. It’ll look like a bit of a mess, but that’s normal.
- Bring it up to a nice simmer. Turn the heat down to low and let it bubble away for at least 30 minutes. Stir it from time to time; this is where I usually sneak a taste and maybe add more salt or a sprinkle of chili powder if I’m feeling wild.
- If you’ve got the patience, let it go for an hour—it only gets better. But honestly, I’ve served it after 20 minutes and nobody complained.
Some Notes I Actually Learned the Hard Way
- If you use lean ground beef, you might want to add a bit more oil, or else it sticks and gets all crumbly.
- Once, I added corn thinking it would be clever—nope. It just got weirdly sweet.
- If you forget to rinse your beans, the chili tastes fine but looks kinda murky. Not the end of the world.
Fun Variations I've Tried (Not All Winners!)
- Added a splash of strong coffee once—surprisingly good, like it deepened the flavor without screaming coffee.
- For a smoky vibe, a little chipotle in adobo goes a long way (just chop it up finely, or use the sauce if you’re worried about heat).
- There was that time I tried adding zucchini. Let's just say, not everything needs to be healthy.
What You'll Need (But Seriously, Improvise)
- Big pot or Dutch oven—if you only have a deep skillet, just go easy on splashing.
- Wooden spoon (mine’s a bit scorched but still does the trick)
- Can opener (if you don’t have one, I’ve used a sturdy spoon and determination, but it’s not ideal!)


How to Store (If You Even Get the Chance)
Pop leftovers in the fridge in an airtight container; it'll keep for 3-4 days—though honestly, in my house it never lasts more than a day! Freezes really well for up to 2 months. I like using old takeout soup containers for storage. Just, uh, label them or you’ll play mystery dinner later (ask me about the time I thought I was thawing chicken stock...)
Serving Ideas—My Two Cents
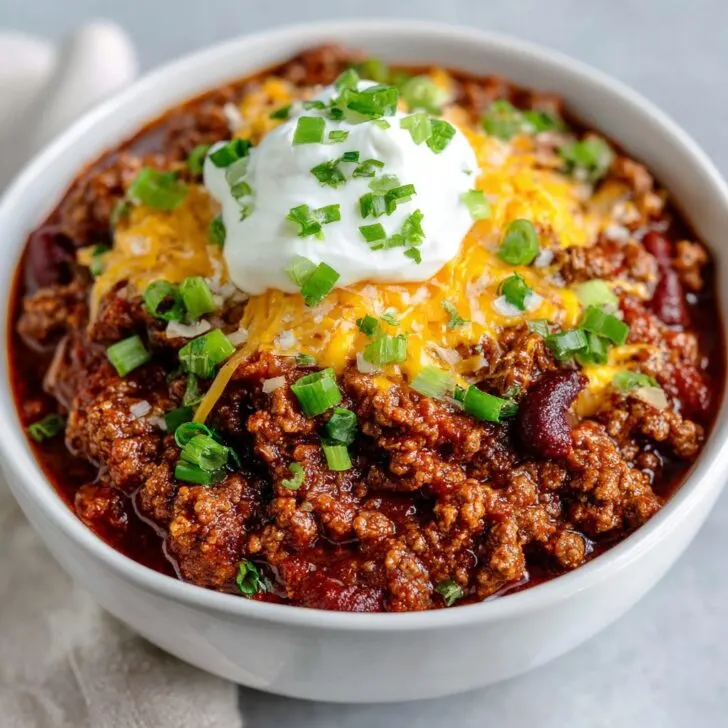
I love plopping a scoop over a baked potato with a bit of cheddar. My kids like it classic: with a mountain of tortilla chips, sour cream, and (too much) shredded cheese. On chilly nights, I've even served it with a hunk of homemade bread. If you want inspiration for making your own bread, check out this guide from Sally's Baking Addiction—she's got the magic touch.
Pro Tips (Mostly from My Own Goofs)
- Don't rush the simmer! I once tried to serve it after 10 minutes and it was weirdly watery and all the flavors hadn’t mingled. Let it do its thing.
- Use a bigger pot than you think you need. Trust me, I’ve scraped chili off the burner more than once.
- If you’re doubling the recipe, go a little easy on the spices at first—otherwise it’s a five-alarm fire. (Unless that's your thing, of course.)
Real Questions People (Actually) Ask Me
- Can I make this in a slow cooker? Oh absolutely! Brown the beef and onions first, then dump everything in the slow cooker; let it cook on low for 6-8 hours or high for about 3. I’ve done this when I need to run errands all afternoon.
- Can I skip the beans? Sure thing, just add a little less broth or it gets soupy. Or try lentils—actually, that’s not half bad.
- Is it spicy? Not overly, unless you go heavy on the cayenne or chipotle. My kids eat it without complaint, and that's saying something.
- Can you freeze it? Yep, works a treat. Just let it cool first. Here’s a helpful article on freezing chili if you want more details: Just a Taste's guide.
- What’s the best way to reheat? I just nuke it in the microwave or warm it on the stove. If it's too thick, splash in a bit of water or broth. Easy.
Anyway, if you try this and end up with a kitchen disaster, at least you'll have a good story. And if you nail it, well, you might just become the chili person in your circle too. (Don't say I didn't warn you!)


Ingredients
- 1 lb ground beef
- 1 medium onion, diced
- 2 cloves garlic, minced
- 1 can (15 oz) kidney beans, drained and rinsed
- 1 can (15 oz) diced tomatoes
- 2 tablespoon tomato paste
- 2 tablespoon chili powder
- 1 teaspoon ground cumin
- ½ teaspoon smoked paprika
- ½ teaspoon salt
- ¼ teaspoon black pepper
- 1 cup beef broth
- 1 tablespoon olive oil
Instructions
-
1Heat olive oil in a large pot over medium heat. Add diced onion and cook for 3-4 minutes until softened.
-
2Add minced garlic and ground beef to the pot. Cook, breaking up the beef with a spoon, until browned and no longer pink.
-
3Stir in chili powder, cumin, smoked paprika, salt, and black pepper. Cook for 1 minute until fragrant.
-
4Add tomato paste, diced tomatoes, kidney beans, and beef broth. Stir well to combine.
-
5Bring the chili to a boil, then reduce heat to low. Cover and simmer for 35-40 minutes, stirring occasionally.
-
6Taste and adjust seasoning if needed. Serve hot with your favorite toppings.
Approximate Information for One Serving
Nutrition Disclaimers
Number of total servings shown is approximate. Actual number of servings will depend on your preferred portion sizes.
Nutritional values shown are general guidelines and reflect information for 1 serving using the ingredients listed, not including any optional ingredients. Actual macros may vary slightly depending on specific brands and types of ingredients used.
To determine the weight of one serving, prepare the recipe as instructed. Weigh the finished recipe, then divide the weight of the finished recipe (not including the weight of the container the food is in) by the desired number of servings. Result will be the weight of one serving.
Did you make this recipe?
Please consider Pinning it!!