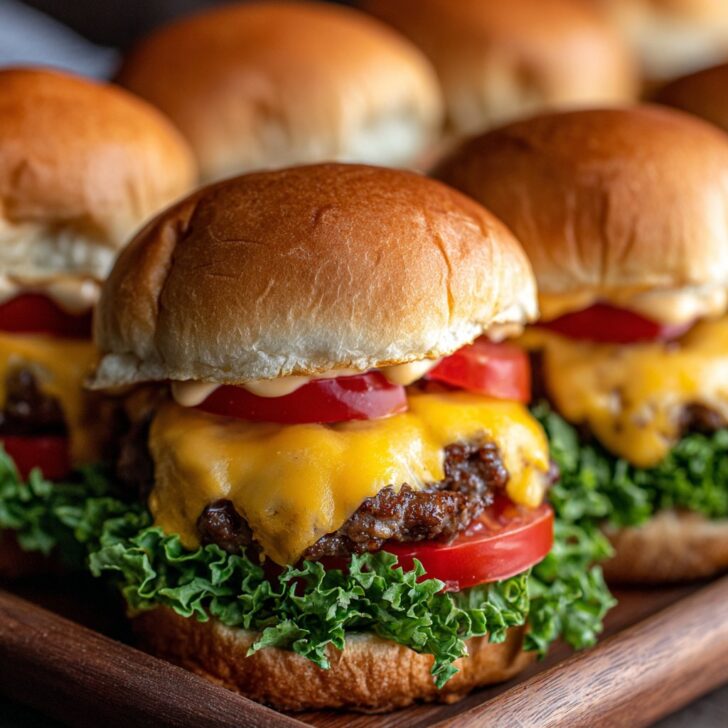
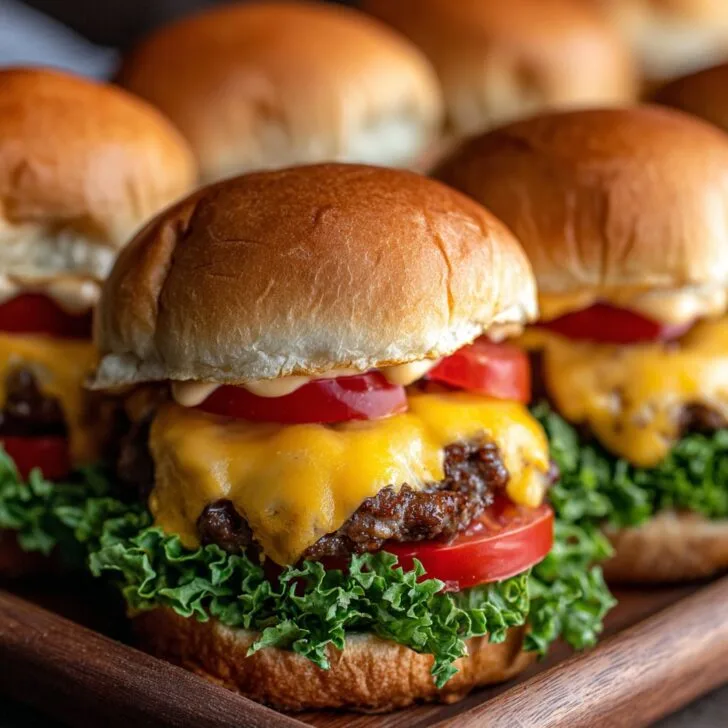
These Cheeseburger Sliders with Secret Sauce Always Steal the Show
Alright, so let me paint you a picture: it’s game night, my cousin's yelling at the TV (again), and I’m in the kitchen flipping tiny burgers while trying not to burn the buns. These sliders aren’t just food—they’re a whole event in our family. Honestly, I started making them when our grill broke and the only thing left was a baking tray and a half pack of cheddar. Now, even when the grill’s working, people ask for these. Go figure, right?
Oh, and that "secret sauce"? My kids think I have some mystical chef skills (truth is, it's mostly pantry stuff I threw together in a pinch). The first time I made it, I spilled half the mustard on the counter. The dog was thrilled.
Why You'll Love This (or: Why My Family Does)
I make these whenever I want to impress people without breaking a sweat. My family goes absolutely bonkers for them because, well, they're bite-sized and you get to eat like, four (or six, if no one's counting). And the sauce is tangy and a little messy—which I think is the best part, though my old kitchen towel might disagree. Admittedly, the first time I did these, I overcrowded the pan and ended up with more of a cheeseburger sheet cake. Tastes great either way though!
What You'll Need (Plus a Few Swaps If You’re Out of Stuff)
- 500g (about 1 lb) ground beef (I use 80/20 for juiciness, but hey, turkey works if you’re feeling healthyish)
- 1 small onion, finely chopped (sometimes I skip this if I’m lazy; don't tell my mom)
- 1 teaspoon garlic powder (or a fresh clove, smashed with a knife—nobody will know)
- Salt and black pepper to taste
- 6-8 slices cheddar cheese (my grandma swore by Kraft, but honestly, whatever's in the fridge)
- 12 slider buns (King’s Hawaiian if I’m feeling fancy; store-brand any other day)
- Butter for brushing (melted, or just a generous swipe with a cold stick if you forget to melt it—guilty)
- Pickles, lettuce, tomato (optional, but I say go wild)
Secret Sauce:
- ¼ cup mayo (full-fat for the win, but I've used light in a pinch—nobody noticed)
- 2 tablespoon ketchup
- 1 tablespoon yellow mustard (sometimes Dijon, but only if I'm out of yellow; the kids never approve though)
- 1 tablespoon sweet pickle relish (or chop up a couple pickles if you’re fresh out)
- 1 teaspoon Worcestershire sauce (I've also just splashed in soy sauce, not traditional, but it works)
- Pinch of smoked paprika or regular paprika
How to Make Cheeseburger Sliders with Secret Sauce
- Prep the Meat: Preheat your oven to 400°F (200°C), or a bit higher if you want things crispy. Mix ground beef, onion, garlic powder, salt, and pepper in a bowl. Don’t overthink it—just mush it together with your hands (I use gloves, but when I forget, soap works wonders).
- Patty Time: Press the beef mix into a rimmed baking tray so it covers the whole thing—like you’re making a giant meat canvas. Try to keep it about ½ inch thick. If it looks kinda weird and patchy, you’re on the right track. (This is where I usually sneak a taste of the raw onions. I know, I know—living dangerously!)
- Bake: Pop the tray in and bake for about 12 minutes. It’ll shrink a bit and bubble at the edges. Don’t freak out if there’s juice pooling—it’s normal. Drain it off carefully, or just blot with kitchen towel if you’re feeling lazy.
- Cheese It Up: Lay on the cheese slices while it’s still hot so it gets all gooey. If you only have shredded cheese, use a handful (or two—no one’s judging).
- Bun Time: Slice the buns in half horizontally (if they aren’t already), lay the bottoms in another tray. Slap the beef-and-cheese sheet on top. Add pickles, tomatoes, lettuce—whatever fits your vibe. Top with bun lids.
- Buttery Finish: Brush the tops with melted butter. Or just wave the stick across if you forgot to melt it. Sprinkle with a little extra salt or sesame seeds if you’re feeling chef-y.
- Back in the Oven: Bake for 5 more minutes, just to get everything cozy together. The tops should go a bit golden.
- Sauce It Up: Mix all the sauce ingredients in a bowl. Taste it. Actually, taste it again. You earned it. Adjust as you like—sometimes I add more relish if I’m craving tang.
- Serve: Pull the sliders apart (they might stick together a bit; it’s all part of the fun), and dollop or spoon on the secret sauce. Pile onto a plate. Watch them disappear.
Some Honest Notes (Stuff I Learned the Hard Way)
- If you overbake the beef, it gets a bit dry, but honestly, the sauce saves it—so don’t stress too much.
- I once tried using brioche buns, but they turned soggy (still edible though!). Now I stick with potato rolls or something a bit sturdier.
- Let it rest for a minute before slicing, or the cheese tries to make a run for it. Not the end of the world, but worth mentioning.
Variations I’ve Tried (Some Hits, One Miss)
- Swap in ground turkey or chicken—pretty tasty, but you might want to add a splash of oil.
- Spicy version: add a chopped jalapeno to the meat. Kids won’t eat it, but the adults loved it.
- Veggie sliders: tried using black bean patties once. They fell apart, but tasted good tucked in with extra cheese and sauce (just go easy on the toppings).
- I did try a blue cheese version once... let’s just say, not a crowd pleaser at our house. Maybe yours?
Equipment You’ll Need (Plus a Handy Hack)
- Baking tray with a rim (you don’t want beef juice running all over; trust me...)
- Sharp knife for slicing buns
- Mixing bowls for the meat and the sauce
- If you don’t have a pastry brush, just use a bit of folded up paper towel for the butter—works fine, and you can toss it when you’re done


How to Store (If They Actually Last)
You can keep these in the fridge, wrapped up tight, for two days. I think they taste better the next day (but honestly, in my house they never last more than a day, so maybe you’ll have better luck). They reheat nicely in the oven at 350°F (175°C), about 10 minutes. Or just eat them cold, straight from the fridge—no judgement here.
Serving Ideas (The Way We Do It)
I love to pile these sliders on a big wooden board with bowls of chips and crunchy pickles on the side. Sometimes I put out a few extra sauces—barbecue, hot sauce, whatever’s in the fridge. My uncle likes his with a cold beer and, oddly, a handful of plain potato chips stuffed right into the slider (it’s a thing, apparently).
Pro Tips (AKA Mistakes I’ve Made So You Don’t Have To)
- Don’t rush the cheese step. I once took them out too soon, and the cheese was just sad, kinda rubbery. Let it melt fully—your patience will be rewarded.
- If you slice the buns too thick, the ratio gets off and you end up feeling like you’re eating a bread sandwich. Thin is key here.
- Actually, I find it works better if you don’t overcrowd the pan—otherwise, things get a little soggy in the middle. Learned this the hard way last Christmas!
FAQ (Real Questions People Have Asked Me, Honest)
- Can I make these ahead of time? Sure thing. Just assemble, cover, and toss in the fridge. Bake off when you’re ready. If you try to reheat them fully assembled, just watch out so the buns don’t dry out.
- What’s in the secret sauce, really? Haha, it’s basically a twist on burger sauce—mayo, ketchup, mustard, relish, and a few extras. You can totally wing it. Once, I ran out of relish and used a splash of pickle juice instead. Worked!
- Can I grill these instead of baking? You could grill the patties, but honestly, the sheet-pan style is part of the magic here. If you do grill, just make small patties and cook quick.
- Where did you get that awesome wooden serving board? Oh, ha! It’s actually just a cutting board I got off IKEA. Nothing fancy. For more party boards, I love browsing Food52—some real beauties there.
- Can I freeze these? Technically, yes. But the buns get a bit weird in texture after thawing; if you must, freeze just the beef and cheese, then assemble fresh. Otherwise, just eat ‘em fresh—it’s not like they stick around long.
- What if I don’t have Worcestershire sauce? Don’t sweat it, just skip or add a splash of soy sauce. I do it all the time.
So that’s my take on cheeseburger sliders with secret sauce—messy, fun, and never a dull moment in the kitchen. Oh, and if you want to learn more about slider parties (or just ogle slider photos), I sometimes scroll through Serious Eats’ slider ideas for inspiration. Anyway, happy cooking—and may your kitchen be filled with laughter, not just smoke alarms!


Ingredients
- 1 lb ground beef (80/20 blend)
- 8 slider buns
- 8 slices cheddar cheese
- ½ cup shredded lettuce
- ¼ cup diced pickles
- ¼ cup mayonnaise
- 2 tablespoon ketchup
- 1 tablespoon yellow mustard
- 1 tablespoon finely minced onion
- Salt and pepper to taste
- 1 tablespoon butter
Instructions
-
1Preheat oven to 350°F (175°C). In a small bowl, mix together mayonnaise, ketchup, mustard, pickles, and minced onion to make the secret sauce. Set aside.
-
2Season ground beef with salt and pepper. Divide into 8 equal portions and shape into small patties slightly larger than the slider buns.
-
3Heat butter in a large skillet over medium-high heat. Cook the patties for 2-3 minutes per side until browned and cooked through.
-
4Place a slice of cheddar cheese on each patty and cover the skillet for 1 minute to melt the cheese.
-
5Slice slider buns and arrange bottoms on a baking sheet. Place cooked patties with cheese on each bun, top with shredded lettuce, and drizzle with secret sauce.
-
6Cover with bun tops and bake sliders in the oven for 3-5 minutes until buns are warm. Serve immediately.
Approximate Information for One Serving
Nutrition Disclaimers
Number of total servings shown is approximate. Actual number of servings will depend on your preferred portion sizes.
Nutritional values shown are general guidelines and reflect information for 1 serving using the ingredients listed, not including any optional ingredients. Actual macros may vary slightly depending on specific brands and types of ingredients used.
To determine the weight of one serving, prepare the recipe as instructed. Weigh the finished recipe, then divide the weight of the finished recipe (not including the weight of the container the food is in) by the desired number of servings. Result will be the weight of one serving.
Did you make this recipe?
Please consider Pinning it!!