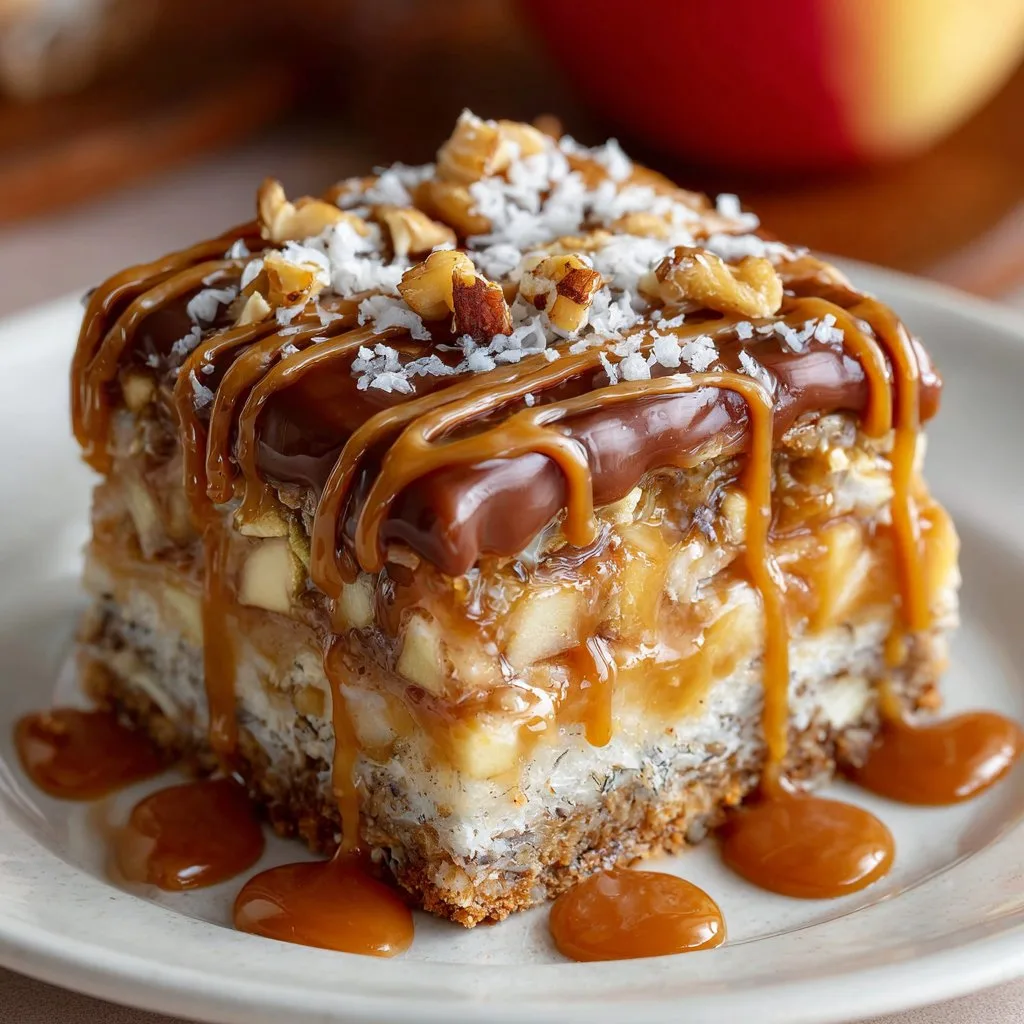
Okay, Let's Talk Caramel Apple Bar (Pull Up a Chair!)
I’ve gotta tell you, the first time I tried to pull off a caramel apple bar was for one of those cozy fall movie nights—one where you swear you’ll stick to apple slices but end up slathering everything in caramel and calling it dinner. I honestly thought it would be a Pinterest fail (sticky kitchen, kids running amok), but somehow, it became a whole vibe. Now, whenever it gets even vaguely chilly, my family starts dropping hints. Or, well, flat-out demanding I make it again. Honestly, it’s the kind of dessert that lets everyone have their way—with a little mess, a little laughter, and a whole lot of toppings. Sometimes I make it for just me, but, shh, don’t tell.
Why I Keep Coming Back to This
I make this when I want everyone at the table (or, let's be real, the couch) grinning. My crew goes bananas (ha, apples?) for this because you can pile on whatever you want—crushed pretzels, mini marshmallows, even those weird leftover Halloween candies. I used to stress about getting the caramel exactly right, but actually, I find it works better if you don’t fuss. Once, I tried to skip the lemon juice step, thinking "how much of a difference could it make?"—turns out, quite a bit. (Brown apples, anyone?)
What You'll Need (And What You Can Sub In)
- 4-5 apples (I like Granny Smith for tartness, but Fuji or Honeycrisp work too; my cousin swears by Jazz apples, but I’ve never found those in my local shop)
- 1 jar of caramel sauce (homemade if you’re feeling ambitious—Sally’s Baking Addiction has a solid recipe—or just grab the store-bought stuff when life is busy)
- 2 tablespoons lemon juice
- Assorted toppings:
- Chopped nuts (pecans, peanuts, walnuts—just use what’s lurking in your pantry)
- Mini chocolate chips
- Sprinkles (the more ridiculous, the better)
- Toffee bits, shredded coconut, graham cracker crumbs
- Mini marshmallows, candy corn (don’t judge, it’s fun)
- Wooden skewers or toothpicks (optional—sometimes I just use my fingers because, why not?)
How to Put It All Together (Without Losing Your Mind)
- Wash and slice your apples—I usually do wedges, but if you like thinner slices, go wild. Toss them in a big bowl with the lemon juice; this is where I usually sneak a slice for “testing purposes.” If you forget the lemon, don’t worry, but your apples might go a bit brown and look like they’ve seen better days.
- Arrange your toppings: Scatter everything into little bowls. Don’t overthink the arrangement unless you’re hosting the Queen or something. My youngest always dumps all the sprinkles into one bowl anyway.
- Warm the caramel: If it’s homemade, you already feel fancy. For jarred sauce, just zap it in the microwave for 20 seconds or so (stir, and watch out—it gets hot fast; I’ve scorched it before and it smells like disappointment).
- Set up your bar: Apples, toppings, caramel, skewers, napkins (you’ll need more than you think). Sometimes I throw a tea towel on the table and call it rustic.
- Let everyone build their masterpiece: Dip apple slices in caramel, add toppings, repeat until everyone is sticky and happy. This is usually when the dog starts hanging around, hoping for a stray marshmallow. Don’t worry if the caramel drips everywhere—that’s half the fun.
The Little Discoveries (AKA My Notes)
- If you make your own caramel, keep a close eye on it. One time I wandered off to answer the door and came back to a pot of sad, burnt sugar. Not my finest hour.
- Sour apples are best for balance, though honestly, I’ll use whatever’s in the fruit bowl.
- Braver folks can add a sprinkle of sea salt to the caramel. I tried this on a whim and now I do it every time.
- Slice apples just before serving if you can, but the lemon juice helps a bit with browning.
Experiments and (One) Flop
- Once, I tried using pears instead of apples. It... wasn’t my favorite. Too soft, kinda slippery. But hey, maybe you’ll like it!
- Crushed pretzels are a win for salty crunch; I tried potato chips once, and it was weirdly good. Not everyone agreed, though.
- If you want something less sweet, add plain Greek yogurt as a dip bar option. My aunt swears by it (I’m still on the fence).
What You Need (and What to Do If You Don't Have It)
- Cutting board and knife—unless you’re a wizard with a paring knife, any board will do; I once used a dinner plate in a pinch.
- Microwave or small pan for the caramel. No microwave? Just pop it in a saucepan over low heat and stir.
- Small bowls or mugs for toppings. Or just dump them in piles on a tray (no judgment here).

Where to Stash Leftovers (If You Even Get That Far)
Store leftover apple slices (if you have any, which is rare in my house) in an airtight container with a squeeze of lemon. Toppings can go back in their bags or containers. Caramel keeps in the fridge for a week or two, but honestly, it never makes it past the second day around here. If you need more caramel ideas—check out King Arthur Baking’s recipe page.
How We Usually Serve It (and the Occasional Curveball)
I love putting everything in the middle of the table and letting everyone build their own. Sometimes I add little espresso cups of strong coffee or hot chocolate, especially when it’s more of a gathering than just a family thing. My partner likes to dunk his apples right in the caramel jar (less washing up, he says). For movie nights, we’ve eaten this straight off the tray. It’s a choose-your-own-adventure dessert, really.
Stuff I Wish I'd Known Earlier (Pro Tips, Sort Of)
- Don’t try to rush slicing the apples; I did once and nearly lost a thumb. Take your time, or rope in a helper with better knife skills.
- If you use homemade caramel, let it cool just a little before serving. I once burned my tongue trying to taste it too soon—rookie error.
- If you’re outdoors, keep the caramel covered till you’re ready—flies love it more than you do.
FAQs from Friends and (Let’s Be Honest) My Kids
- Can I make this ahead? Sure, you can slice the apples and prep toppings, but wait to warm the caramel till you’re ready. The apples will keep okay with lemon juice, but honestly, they’re best fresh.
- What’s the best caramel? I actually prefer jarred caramel when I'm in a rush, but homemade does taste amazing. If you’re new to homemade, Bigger Bolder Baking has a nice, not-too-scary method.
- How do you keep it from getting too messy? You don’t, really! That’s part of the fun. If it worries you, just set out extra napkins. Or eat over the sink (I’ve done both).
- Can you use other fruit? I mean, you can, but apples hold up best. Bananas go mushy, and grapes just don’t work (ask me how I know).
And, oh—if you’re wondering if you can drizzle the caramel on ice cream, the answer is yes. Sometimes that’s dessert the next day, if there’s any caramel left. Which is rare.
Happy caramel-ing, friend! Let me know how your apple bar turns out—or just invite me over next time, I’ll bring extra sprinkles.
Ingredients
- 1 ½ cups all-purpose flour
- ½ cup unsalted butter, softened
- ½ cup granulated sugar
- 2 medium apples, peeled and diced
- ½ teaspoon ground cinnamon
- ¼ teaspoon ground nutmeg
- ¼ teaspoon salt
- ½ cup caramel sauce, plus extra for drizzling
Instructions
-
1Preheat the oven to 350°F (175°C). Line an 8x8-inch baking pan with parchment paper.
-
2In a bowl, cream together the butter and sugar until light and fluffy. Add flour and salt, mixing until a crumbly dough forms.
-
3Press two-thirds of the dough evenly into the bottom of the prepared pan to form the crust.
-
4In a separate bowl, toss the diced apples with cinnamon and nutmeg. Spread the apple mixture evenly over the crust.
-
5Drizzle ½ cup caramel sauce over the apples. Crumble the remaining dough over the top.
-
6Bake for 35 minutes or until the top is golden brown. Cool completely, then drizzle with extra caramel sauce before slicing and serving.
Approximate Information for One Serving
Nutrition Disclaimers
Number of total servings shown is approximate. Actual number of servings will depend on your preferred portion sizes.
Nutritional values shown are general guidelines and reflect information for 1 serving using the ingredients listed, not including any optional ingredients. Actual macros may vary slightly depending on specific brands and types of ingredients used.
To determine the weight of one serving, prepare the recipe as instructed. Weigh the finished recipe, then divide the weight of the finished recipe (not including the weight of the container the food is in) by the desired number of servings. Result will be the weight of one serving.
Did you make this recipe?
Please consider Pinning it!!

