
Let Me Tell You About Candied Orange Slices
Alright, so — have you ever had one of those days where you just crave something sweet and a little fancy, but not, you know, bake-a-three-layer-cake fancy? That's precisely when I pull out my big pot and make candied orange slices. The first time I made these, I was somewhere between exasperated and delighted; I'd just mopped up a sticky mess on the counter, and for some reason it tasted like accomplishment (with a whisper of citrus revenge—I got the oranges before they got me!). A tray of these always reminds me of my gran, who used to sneak a few into her coat pocket "for later," which was probably code for "right now, when no one’s looking."


Why You'll Love This Little Sweet (Or Why I Do, Anyway)
I make these candied orange slices on grey afternoons or whenever someone's got a cold (vitamin C by sugar, anyone?). Honestly, my family goes mad for them, especially when I chop them up and toss over chocolate cake... or just when they're still a bit warm and chewy. True story: I once tried making them with lemons instead, and let's just say, no one was fighting over the leftovers. Occasionally, when I'm feeling lazy, I don't bother with precision slicing—chunky wedges are rustic, right? Anyway, even when things get a bit sticky, the result makes the cleanup worth it. Oh, and if you ever catch me nibbling the peels before they're done, you saw nothing.
Grab These Ingredients (Or, You Know, Whatever Works)
- 3 medium oranges (Navel’s usually my go-to, but blood oranges look pretty wild on a platter)
- 2 cups granulated sugar (sometimes I sub in half brown sugar if I want a more caramel-ish sauce)
- 2 cups water (tap is fine — gran always said bottled, but who's got time?)
- Optional: 1 teaspoon vanilla extract (or a splash of bourbon, which, let's be honest, is for the grown-ups)
- Pinch of salt (skippable, but it perks up the flavor a bit)
How I Actually Make Candied Orange Slices (Mess Embraced)
- First things first—wash the oranges. Like, really scrub them, especially if your grocer’s into wax coatings. Slice the oranges into rounds, about ¼ inch thick. Sometimes mine end up a touch thinner or thicker; no one’s measuring with a ruler here.
- In a wide saucepan, stir together sugar and water. I always start with medium heat. Bring it to a simmer—think gentle little bubbles, not a rolling boil—then toss in your orange slices. Try to lay them in a single layer, but to be honest, they always overlap somewhere. Don't panic—they’ll shrink a bit as they cook.
- Add the pinch of salt, and if you’re going for it, the vanilla or bourbon. It’ll smell pretty much amazing at this point. Let the oranges gently simmer for about 40-50 minutes. I turn mine with tongs every so often, just so they don’t stick. If the syrup looks too frothy, I lower the heat even more (been burned here before... literally).
- Once they turn kind of translucent (not quite see-through, but definitely more jewel-toned than when they started), lift them out with a fork or slotted spatula onto a rack set over parchment. Drip hazards everywhere, but that's part of the fun, right?
- Let them dry for at least 6 hours—or overnight if you somehow resist the temptation. They’ll be glossy and a bit tacky to the touch. Here’s where I usually sneak a taste and pretend it’s quality control.


Notes from My Adventures in Orange Slicing
- Peels sometimes split while cooking. It’s fine—they still taste bang-on. Actually, I find the slightly rough ones make better toppings.
- If you try to dry them in a cold kitchen, they take forever. I once popped them on top of a warm (not hot) radiator—worked a treat. Probably not up to code, but hey.
- I tried dipping them in dark chocolate once—total winner. White chocolate? Weirdly, not so much for me.
Things I've Tried (Good and... Not So Good)
- Adding a cinnamon stick to the syrup is lovely around the holidays.
- Using grapefruit… tastes alright but, frankly, a bit bitter. On second thought, maybe just stick to oranges unless you like a punch.
- Sliced kumquats are adorable but take half your life to prep. Maybe worth it for a fancy dinner, not a Tuesday night.


Do You Need Fancy Gear?
I usually grab a mandolin for nice even slices, but when I can't find it (which is often), my regular old chef's knife does the job—just go slow and steady. Don’t have a wire rack? I’ve put parchment right on the counter before, and it worked, albeit a little sticky. Improvise, you'll be grand.
How I Store Them (Sort Of)
I seal them in an airtight tub with bits of parchment between layers; supposedly they keep up to two weeks, but to be honest, in this house they’re gone in about 24 hours. If you must hoard them, fridge is even better. Syrup leftovers? Drizzle it on pancakes — trust me.
How I Like to Serve Candied Oranges
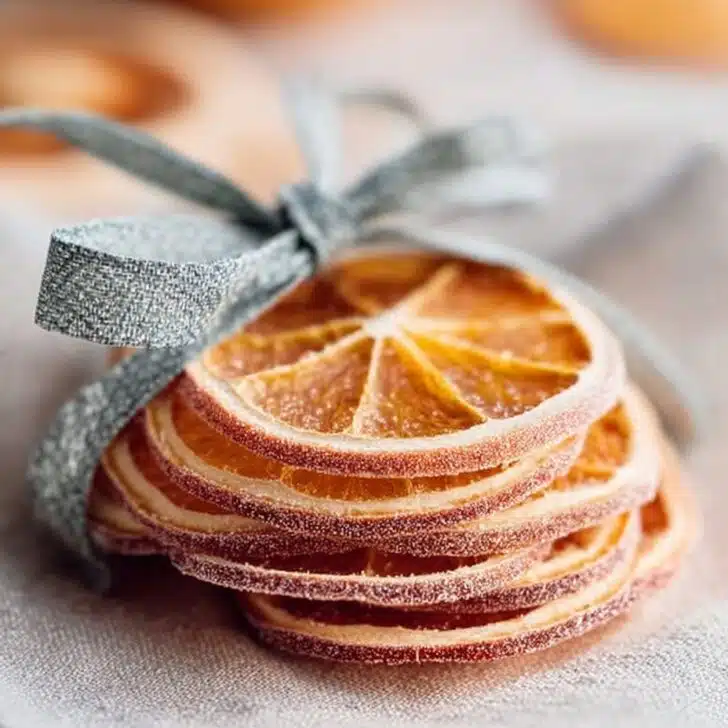
So, there's the obvious way: straight off the rack, slightly warm, no shame. But they’re also brilliant chopped onto vanilla ice cream, tucked into chocolate chip cookies, or, my mum’s favorite, as a tea stirrer (I know...). If you want to be fancy, stack them up and dust with icing sugar for a faux gourmet look. We do it at Christmas and call it dessert; nobody complains.
Some Hard-Earned Orange Wisdom
- Once I tried speeding up the boiling stage; slices got leathery. Don’t do it! Lower and slower is, well, the way.
- Forgot to lay parchment under the rack once. The sticky cleanup haunts me still.
- Let them dry fully before piling into a container. Learned that lesson the hard way—sticky lumps of regret!
FAQ from Friends, Neighbours, and One Cheeky Cousin
- Can I use clementines instead? Yep, though they’re a bit fiddlier to slice and sometimes go mushy faster. Still taste dreamy, though.
- Is it worth peeling the oranges first? Actually, no—leave the peel! That’s half the charm (and the chew). Just pick good, unwaxed ones.
- The syrup’s too thin—what gives? It thickens up when it cools, but if it’s watery, try simmering a smidge longer next go. Or just pour it over waffles and call it a win.
- How can I make them less sweet? Ha! It’s candy, mate—embrace the sugar. But you could try using more tart oranges or rolling the slices in a little extra salt after drying.
- They stuck together in storage. Fixable? A little. Just dust with icing sugar or separate with parchment next time. Or eat the whole sticky batch at once—won’t judge!
Oh, right, one last story: I once made these as a last-minute hostess gift, only to find half had vanished by the time I got out the door. Lesson? Always make extra. And maybe hide a stash for yourself, because someone will sniff them out otherwise, guaranteed.
Ingredients
- 3 medium oranges (Navel’s usually my go-to, but blood oranges look pretty wild on a platter)
- 2 cups granulated sugar (sometimes I sub in half brown sugar if I want a more caramel-ish sauce)
- 2 cups water (tap is fine — gran always said bottled, but who's got time?)
- Optional: 1 teaspoon vanilla extract (or a splash of bourbon, which, let's be honest, is for the grown-ups)
- Pinch of salt (skippable, but it perks up the flavor a bit)
Instructions
-
1First things first—wash the oranges. Like, really scrub them, especially if your grocer’s into wax coatings. Slice the oranges into rounds, about ¼ inch thick. Sometimes mine end up a touch thinner or thicker; no one’s measuring with a ruler here.
-
2In a wide saucepan, stir together sugar and water. I always start with medium heat. Bring it to a simmer—think gentle little bubbles, not a rolling boil—then toss in your orange slices. Try to lay them in a single layer, but to be honest, they always overlap somewhere. Don't panic—they’ll shrink a bit as they cook.
-
3Add the pinch of salt, and if you’re going for it, the vanilla or bourbon. It’ll smell pretty much amazing at this point. Let the oranges gently simmer for about 40-50 minutes. I turn mine with tongs every so often, just so they don’t stick. If the syrup looks too frothy, I lower the heat even more (been burned here before... literally).
-
4Once they turn kind of translucent (not quite see-through, but definitely more jewel-toned than when they started), lift them out with a fork or slotted spatula onto a rack set over parchment. Drip hazards everywhere, but that's part of the fun, right?
-
5Let them dry for at least 6 hours—or overnight if you somehow resist the temptation. They’ll be glossy and a bit tacky to the touch. Here’s where I usually sneak a taste and pretend it’s quality control.
Approximate Information for One Serving
Nutrition Disclaimers
Number of total servings shown is approximate. Actual number of servings will depend on your preferred portion sizes.
Nutritional values shown are general guidelines and reflect information for 1 serving using the ingredients listed, not including any optional ingredients. Actual macros may vary slightly depending on specific brands and types of ingredients used.
To determine the weight of one serving, prepare the recipe as instructed. Weigh the finished recipe, then divide the weight of the finished recipe (not including the weight of the container the food is in) by the desired number of servings. Result will be the weight of one serving.
Did you make this recipe?
Please consider Pinning it!