
Let's Talk Brussels Sprouts (and a Little Lemon)
Alright, friend, pull up a chair. So the first time I made Brussels Sprouts with Garlic and Lemon, it was mostly out of desperation (I had exactly three things in the fridge and two of them were for my kid's packed lunch). But then—some sort of kitchen magic happened and now, honestly, it's one of those sides that makes people say, "Wait, you made these?" Which is just the best, isn't it?
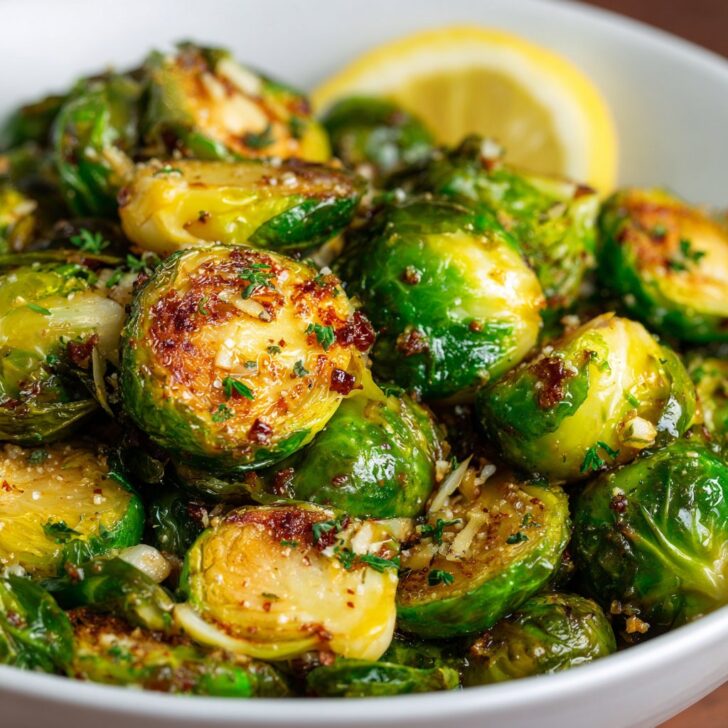
I have this memory of my older brother making faces at Brussels sprouts when we were kids—he was convinced they were punishment food. Jokes on him though, because now he asks for seconds every Christmas. And, just to be clear, these aren't those boiled, sad little green balls from the 80s. Nope. We're doing them right, with crispy edges, plenty of garlic, and a hit of bright lemon that, I dunno, just makes them sing. (Okay, not literally. That would be weird.)
Why You'll Love This (Or At Least Like It A Lot)
I make this when I want something green on the table but don't have the energy for a fiddly salad (you know the ones with three dressings and two cheeses). My family goes crazy for this because it's crispy, garlicky, and just a little bit zingy. Also, it’s the rare veggie dish that actually disappears at potlucks (I once brought a double batch and still came home with an empty dish—small victories, right?).
Here's the thing though: I used to be someone who burned garlic every single time. Like, every. single. time. I don't anymore, but if you do, you're in good company. We'll fix that together.
What You’ll Need (Plus Some Cheeky Substitutes)
- Brussels sprouts (about 500g or a generous handful; frozen works if you're in a pinch but I think fresh tastes better)
- 2-3 cloves garlic, minced (I sometimes just smash them with the side of my knife because, well, who's watching?)
- 1 lemon (zest and juice; in a jam, I've used bottled lemon juice, but don't tell my gran)
- 3 tablespoon olive oil (or sunflower oil if that's what's lurking in your cupboard)
- Salt & pepper to taste (Maldon salt is my posh option, but table salt does the job)
- Optional: a pinch of chili flakes or a sprinkle of parmesan if you’re feeling a bit extra
How To Make It (With a Few Honest Asides)
- Preheat your oven to 220°C (428°F). Or just whack it up high—honestly, unless your oven's ancient, close enough is good enough.
- Trim the ends of your Brussels sprouts and cut them in half. If they look a bit gnarly on the outside, just peel off a leaf or two. No judgement.
- Toss the sprouts in olive oil, salt, and pepper on a big baking tray. Get your hands in there. It’s messy but kind of satisfying.
- Spread them cut-side down. This is where the magic happens—crispy bottoms! Pop them in the oven for about 18-22 minutes. I usually check at 15. If your oven cooks unevenly (like mine always does), give the tray a shake halfway through. Don’t panic if you smell a bit of charring; a little browning is good, burnt is... less good.
- While that's going on, smash or mince your garlic. Zest your lemon; try not to get your knuckles (been there, got the scars).
- When the sprouts look crispy and a little golden (don’t worry if a few leaves get really dark—that’s flavour!), pull them out. Sprinkle over the garlic and lemon zest, then toss everything together so the heat mellows the garlic without burning it. Pour over the lemon juice. This is where I usually sneak a taste. Maybe more salt? Up to you.
- Serve warm, or honestly, cold leftovers are weirdly good too. Just a suggestion.
Bits and Bobs: Notes From My Kitchen
- I've accidentally zested an orange instead of a lemon (don't ask). Result: not bad, but definitely sweeter.
- If you add the garlic too early, it'll burn. Trust me. Learned this the hard way.
- Tried skipping the oil once. Ended up with sad, leathery sprouts. Don’t.
Twists and Experiments (Some Better Than Others)
- Sometimes I add a handful of walnuts or pecans right at the end—adds a nice crunch.
- Tried drizzling with honey (saw it on Serious Eats) and it's surprisingly tasty.
- One time I used lime instead of lemon—honestly, didn't love it. Maybe that's just me.
- If you’re feeling fancy, a little crumbled feta on top is ace. More ideas at Bon Appétit.
Equipment (And What To Do If You're Missing Stuff)
Honestly, you just need a big baking tray (sheet pan, whatever you call it). If you don't have one, use a roasting dish or even a big skillet. I once used a pizza tray—worked fine, though the holes made it a bit tricky. Oh, and a sharp knife helps, but I've hacked through with a dodgy butter knife before (not recommended but, you know, needs must).


How To Store Leftovers (If Any Survive)
Stick them in an airtight container in the fridge for up to two days. Though honestly, in my house it never lasts more than a day! I think these taste better the next day, especially tossed into a salad or reheated in a frying pan. Just don’t microwave them unless you want the whole kitchen to smell like, well, sprouts.
Serving Them Up (My Way, At Least)
I love these alongside roast chicken or even on their own with a fried egg (my lazy lunch). My cousin insists they belong with Christmas dinner—there's family debate every year. Or just eat them off the tray standing at the counter. No shame.
Pro Tips: Kitchen Wisdom (and a Few Oopsies)
- I once tried rushing the roasting by cranking the oven even higher—ended up with charred outsides and rock-hard insides. Don’t do that.
- Lining the tray with parchment makes for easier cleanup, but sometimes the sprouts don’t crisp up as much. Tradeoff.
- If you’re tempted to skip tasting for seasoning at the end, resist. I usually regret it when I forget!
FAQ (Because Apparently People Actually Ask These)
- Can I use frozen Brussels sprouts? Yeah, you can! They won’t get as crispy, but they’ll still taste pretty good. Maybe roast a few minutes longer.
- What if I hate garlic? Hmm, well, just leave it out or try shallots instead. Or maybe this isn’t the recipe for you—it’s really garlic-forward.
- How do I make them less bitter? Roasting helps a lot, but you can also toss with a splash of maple syrup or honey at the end. I got that tip form a Canadian friend, actually.
- Why do mine get soggy? Chances are the tray's too crowded. Give them some space (I learned this after many batches stuck together in a sad little pile).
- Can I prep these ahead? You can trim and halve the sprouts a day early, but roast them fresh for best texture. Tried reheating in the microwave once and, well, won't do that again.
And there you have it. Brussels Sprouts with Garlic and Lemon—maybe not life-changing, but pretty darn good. If you try it, let me know! Or, more likely, just keep it as your new secret weapon. Cheers!


Ingredients
- 1 lb Brussels sprouts, trimmed and halved
- 3 tablespoons olive oil
- 4 cloves garlic, minced
- 1 lemon, zested and juiced
- ½ teaspoon salt
- ¼ teaspoon black pepper
- ¼ teaspoon crushed red pepper flakes (optional)
- 2 tablespoons chopped fresh parsley (optional, for garnish)
Instructions
-
1Preheat the oven to 425°F (220°C). Line a baking sheet with parchment paper.
-
2In a large bowl, toss the Brussels sprouts with olive oil, minced garlic, salt, black pepper, and red pepper flakes if using.
-
3Spread the Brussels sprouts in a single layer on the prepared baking sheet.
-
4Roast for 20-25 minutes, stirring halfway through, until the Brussels sprouts are golden brown and tender.
-
5Remove from the oven and immediately toss with lemon zest and lemon juice.
-
6Transfer to a serving dish and garnish with chopped parsley if desired. Serve warm.
Approximate Information for One Serving
Nutrition Disclaimers
Number of total servings shown is approximate. Actual number of servings will depend on your preferred portion sizes.
Nutritional values shown are general guidelines and reflect information for 1 serving using the ingredients listed, not including any optional ingredients. Actual macros may vary slightly depending on specific brands and types of ingredients used.
To determine the weight of one serving, prepare the recipe as instructed. Weigh the finished recipe, then divide the weight of the finished recipe (not including the weight of the container the food is in) by the desired number of servings. Result will be the weight of one serving.
Did you make this recipe?
Please consider Pinning it!!