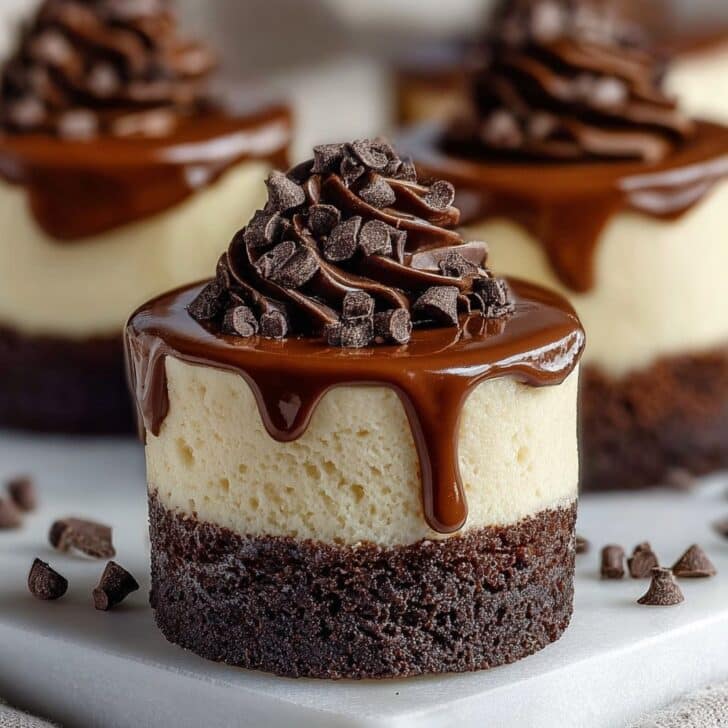
Brownie Bottom Mini Cheesecakes: The Little Treat That Always Delivers
Oh buddy, let me tell you about the wild (okay, not that wild) Saturday I spent wrestling my sweet tooth into submission with these brownie bottom mini cheesecakes. I whipped them up after my sister texted me a photo of some fancy-pants cheesecake at a bakery — you know, the kind with gold leaf and a price tag that makes your eyebrow twitch? Well, we’re not that fancy here. I said, let’s keep the decadent cheesecake but fuse it to a thick, fudgy brownie base and, boom, you’ve got the best of both worlds. Seriously, these are like the dessert version of a three-day weekend — never long enough!

Why I Love Making These (And You Might, Too)
I make these when I’ve promised to bring “something sweet” and realize that, surprise, it’s already 8pm and the oven is the warmest thing in the house. My family goes bonkers for these and, honestly, even the fussy eaters mysteriously lose all willpower. Maybe it’s the gooey brownie married to creamy cheesecake. Or maybe (let’s be honest) it’s that they’re bite-size so you can eat three and still say you “only had a couple.” When I first tried these, I made a colossal mess, but actually, clean up is easier than a full tray of brownies and a whole cheesecake (and you don’t have to faff around with a water bath—hallelujah!).
What You'll Need - Ingredients with Wiggle Room
- ½ cup (115g) unsalted butter, melted (salted works in a pinch, just skimp a little on added salt!)
- ¾ cup (150g) granulated sugar
- 2 large eggs, at room temp (When in a hurry, I’ve used them straight from the fridge — don’t tell Paul Hollywood.)
- ⅓ cup (40g) unsweetened cocoa powder (Dutch process or regular, doesn’t really matter here)
- ½ cup (65g) all-purpose flour (I even swapped in oat flour once — kinda surprising texture but not terrible)
- ¼ teaspoon salt
- ½ teaspoon vanilla extract, plus ½ teaspoon for the cheesecake part
- 8 oz (225g) cream cheese, softened (Full fat is my pick but low-fat is ok-ish)
- ¼ cup (50g) granulated sugar (you could try honey, but it gets a bit runny)
- 1 large egg
- 1 tablespoon sour cream (I've subbed in Greek yogurt when the fridge was looking sad)
- Optional: A handful of mini chocolate chips or a dusting of cocoa powder for topping
Let’s Get Baking! (No Need for Perfection)
- First, grab your trusty 12-cup muffin tin and line it with paper liners. Or, honestly, a bit of cooking spray works if you forgot the liners — but maybe use a fork to pry them out later.
- For the brownie batter: In a medium-ish bowl, whisk together the melted butter and ¾ cup sugar. Add two eggs and whisk until glossy (this is where I usually sneak a taste — yes, yes, I know, raw eggs... rebel).
- Sift in the cocoa powder, flour, and salt. Stir until just combined — don’t overmix, unless you like weird, rubbery brownies.
- Add ½ teaspoon vanilla and give it a final gentle swirl. The batter will be thick — like, spackle-thick. Totally normal.
- Plop a big spoonful of brownie batter into the bottom of each muffin cup, pressing lightly so it covers the base. Not rocket science; lumpy is fine.
- For the cheesecake layer: In a fresh bowl (or the bowl from earlier, if you’re lazy like me), beat together cream cheese and ¼ cup sugar until smooth and creamy. An electric mixer helps, but elbow grease works.
- Mix in the egg, sour cream, and ½ teaspoon vanilla. Beat until it’s looking pretty smooth. Don’t worry if there are a few little lumps — they vanish after baking.
- Spoon the cheesecake mixture evenly over the brownie batters. Gently smooth the tops — or just kind of swirl them, if you’re feeling artsy.
- If you like a little extra chocolate drama, sprinkle mini choc chips on top. Or don’t. Up to you.
- Bake at 350°F (175°C) for 20-23 minutes. The cheesecakes should look set but be a bit wobbly in the middle if you give the tray a gentle nudge. (Don’t overdo it — I did once, and they turned to rock.)
- Let them cool in the pan for 15 minutes. Then move to the fridge — at LEAST an hour, but longer is better. I think these taste even better the next day (if they survive that long).

What I’ve Learned (AKA Real-World Notes)
- If you forget to line the muffin tin, you can try running a butter knife around the edge while still a bit warm — but don’t blame me if you eat a little extra crust as “damage.”
- I once tried using margarine instead of butter. Let’s just say the universe did not reward me for that shortcut.
- Brownie base thickness is not a science. Some of my cheesecakes have a lopsided look — tastes the same!
Variations (Because I Can’t Leave Well Enough Alone)
- Swirl some raspberry jam onto the cheesecake top before baking — tried it on a whim, surprisingly tasty!
- Crushed Oreos instead of brownie base? Kinda worked, but I missed the fudge factor.
- Add a teaspoon of instant coffee powder to the brownies for a little grown-up flavor. My husband called it “breakfast.”
- Tried adding diced strawberries once. It turned a tad soupy, but hey, live and learn.

Equipment—ish
- Muffin pan — but if you don’t have one, you can try individual ramekins and just watch the baking time
- Paper liners (or grease up well and grab a bit of patience)
- Two mixing bowls
- An electric mixer helps, but I have done it with a trusty old fork (need strong arms!)
- Measuring cups/spoons or just your “eyeball and hope for the best” technique. I’ve done both.
How to Store (For theoretical leftovers... ha!)
Technically, you can store these in the fridge for up to three days, loosely covered (better in an airtight container). But I have to admit — in my house, these barely survive to see the back of the fridge. They’re just too easy to grab. Freezing works, too! Wrap them up, and you can sneak one out months later. Or, you know, forget you stashed them and have a happy surprise.
Serving Ideas (Mine Involve Coffee... or Ice Cream)
We like to plate these with a little dollop of whipped cream or maybe a small scoop of ice cream on the side. (My cousin dunks hers straight in her coffee; I don’t judge.) For parties, I sometimes top with a berry or a mint leaf. But really? I eat them straight from the fridge, standing over the sink. Classic.
Things I Learned the Hard Way (Pro Tips... Sort Of)
- Don’t rush the chilling time! I tried serving warm once — delicious but messy, so maybe plan ahead.
- Use room temp cream cheese if you can. I’ve microwaved it to hurry things (sometimes the edges turn lumpy), but hey, it still tastes awesome.
- Don’t worry if they look wobbly when you pull them form the oven. That’s a good sign!
Real-Life FAQ: Because I Get These Questions a LOT
- Can I use boxed brownie mix?
Sure! Just prep according to the box but use less batter per cup — nobody’s judging, and it’s even faster. - Can I make these gluten-free?
Yeah, swap in your favorite 1-for-1 GF flour. Actually, my neighbor prefers them that way now. - What if I forget to chill them?
Well, you’ll have a gooey mess, but it’ll still taste like heaven, promise. - Is a stand mixer absolutely necessary?
Nah, I usually just grab a hand whisk or fork and go for it. - How do you know when they’re done?
The tops will look set and just a wee bit jiggly — don’t wait for them to be hard or you’ll regret it. (Trust me, learned that one the hard way!) - Can kids help?
Absolutely! Mine love swirling the cheesecake and stealing chocolate chips.
So that’s the lowdown on my Brownie Bottom Mini Cheesecakes recipe adventure. Hit me up if you try it, or just send photos of the ones that turned out ugly — those are my favorites. Happy baking, mate!
Ingredients
- ½ cup (115g) unsalted butter, melted (salted works in a pinch, just skimp a little on added salt!)
- ¾ cup (150g) granulated sugar
- 2 large eggs, at room temp (When in a hurry, I’ve used them straight from the fridge — don’t tell Paul Hollywood.)
- ⅓ cup (40g) unsweetened cocoa powder (Dutch process or regular, doesn’t really matter here)
- ½ cup (65g) all-purpose flour (I even swapped in oat flour once — kinda surprising texture but not terrible)
- ¼ teaspoon salt
- ½ teaspoon vanilla extract, plus ½ teaspoon for the cheesecake part
- 8 oz (225g) cream cheese, softened (Full fat is my pick but low-fat is ok-ish)
- ¼ cup (50g) granulated sugar (you could try honey, but it gets a bit runny)
- 1 large egg
- 1 tablespoon sour cream (I've subbed in Greek yogurt when the fridge was looking sad)
- Optional: A handful of mini chocolate chips or a dusting of cocoa powder for topping
Instructions
-
1First, grab your trusty 12-cup muffin tin and line it with paper liners. Or, honestly, a bit of cooking spray works if you forgot the liners — but maybe use a fork to pry them out later.
-
2For the brownie batter: In a medium-ish bowl, whisk together the melted butter and ¾ cup sugar. Add two eggs and whisk until glossy (this is where I usually sneak a taste — yes, yes, I know, raw eggs... rebel).
-
3Sift in the cocoa powder, flour, and salt. Stir until just combined — don’t overmix, unless you like weird, rubbery brownies.
-
4Add ½ teaspoon vanilla and give it a final gentle swirl. The batter will be thick — like, spackle-thick. Totally normal.
-
5Plop a big spoonful of brownie batter into the bottom of each muffin cup, pressing lightly so it covers the base. Not rocket science; lumpy is fine.
-
6For the cheesecake layer: In a fresh bowl (or the bowl from earlier, if you’re lazy like me), beat together cream cheese and ¼ cup sugar until smooth and creamy. An electric mixer helps, but elbow grease works.
-
7Mix in the egg, sour cream, and ½ teaspoon vanilla. Beat until it’s looking pretty smooth. Don’t worry if there are a few little lumps — they vanish after baking.
-
8Spoon the cheesecake mixture evenly over the brownie batters. Gently smooth the tops — or just kind of swirl them, if you’re feeling artsy.
-
9If you like a little extra chocolate drama, sprinkle mini choc chips on top. Or don’t. Up to you.
-
10Bake at 350°F (175°C) for 20-23 minutes. The cheesecakes should look set but be a bit wobbly in the middle if you give the tray a gentle nudge. (Don’t overdo it — I did once, and they turned to rock.)
-
11Let them cool in the pan for 15 minutes. Then move to the fridge — at LEAST an hour, but longer is better. I think these taste even better the next day (if they survive that long).
Approximate Information for One Serving
Nutrition Disclaimers
Number of total servings shown is approximate. Actual number of servings will depend on your preferred portion sizes.
Nutritional values shown are general guidelines and reflect information for 1 serving using the ingredients listed, not including any optional ingredients. Actual macros may vary slightly depending on specific brands and types of ingredients used.
To determine the weight of one serving, prepare the recipe as instructed. Weigh the finished recipe, then divide the weight of the finished recipe (not including the weight of the container the food is in) by the desired number of servings. Result will be the weight of one serving.
Did you make this recipe?
Please consider Pinning it!