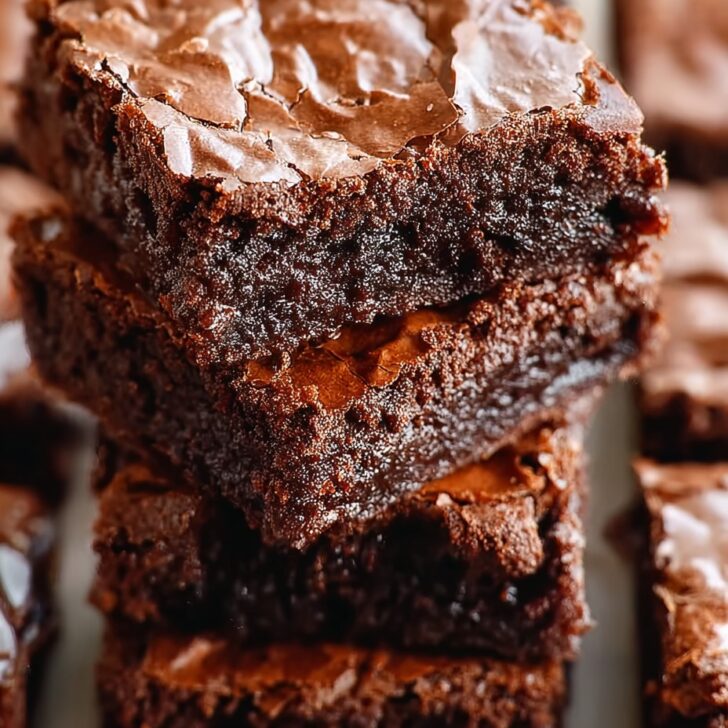
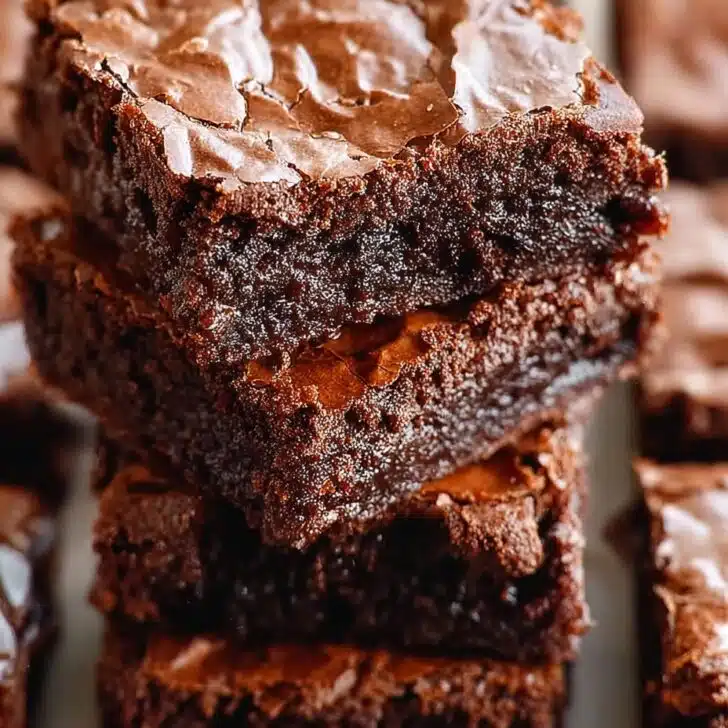
Bake These Brownies When You Just Can't Stomach Another Box Mix
So, brownies. I swear, I've tried more boxed mixes than I'd care to admit (Betty Crocker, I'm looking at you), usually while fending off small children who want to help (e.g. leave floury handprints everywhere). But these—these are the brownies my family basically arm-wrestles for. My cousin Jamie once tried hiding the last square behind the ketchup in the fridge. Didn't work. If I'm being honest, these started out as a "smash together what's in the pantry" project that went weirdly well. And now here we are.
Why You'll Love This Brownie Situation
I make these when it's been one of those weeks (say, the cat broke a mug and your Wi-Fi is spotty), or whenever my nephews are coming over to "help" again. My family goes slightly bonkers for these because they're way fudgier in the middle than Eddie's box stuff, bordering on that perfect almost-cooked texture. Plus—no weird aftertaste from mystery oils, thank you very much. Also, honestly, I can control the chocolate level. If the day's been rough, I double the chips and call it medicine. (Is it? Who cares, it works.)
Gather Up These Ingredients (Substitutions Welcome!)
- 1 cup (225g) unsalted butter, melted
(I've used salted when out of unsalted—just skip the extra salt later, it works fine. My Gran swears by Kerrygold but use what's handy). - 2 cups (400g) granulated sugar
(Occasionally I’ll do half brown sugar for a chewier vibe). - 4 large eggs
- 1 tablespoon vanilla extract
(I've tried with cheap vanilla and fancy stuff; honestly, it's always good). - 1 cup (120g) all-purpose flour
- 1 cup (85g) unsweetened cocoa powder
(Dutch process or natural—I tend to just use whatever was on sale that week. Both work, but Dutch gives a deeper flavour.) - ½ teaspoon salt
- 1 cup (175g) semi-sweet or dark chocolate chips
(Or a mix of both. Or chuck some chopped chocolate bar in there if that's what you've got. Once I tried white chocolate—actually, maybe don’t.) - Optional: a handful of chopped walnuts or pecans (totally up to you!)
Here's How You Do It (With Honest Commentary)
- Preheat your oven to 350°F (180°C). If you forget and have to wait halfway through mixing, that's normal. Grease or line a 9x13 inch tin. I've used a smaller pan in a pinch; the brownies get thicker and need more time, natch.
- In a decent-sized bowl (I've used a soup pot, don't judge), whisk together melted butter and sugar until it's kinda glossy. Somewhere between 1-2 minutes, but who's counting?
- Beat in your eggs and vanilla. This is where I sneak a taste—yep, raw eggs, I'm living dangerously.
- Toss flour, cocoa powder, and salt into the mix. Fold together with a spatula or, you know, a sturdy wooden spoon. Don’t over-stir! (It gets weirdly tough, which no one wants.)
- Stir in your chocolate chips and nuts if using. The batter gets thick, but you’re on the right track—it should sort of resist the spoon.
- Sling the batter into your pan, kind of smooshing it into the corners. Pristine smoothness is overrated—peaks and dips make the chewy bits better.
- Bake 25–30 minutes until a toothpick comes out with some fudgy crumbs, not wet batter. Actually, on second thought, pull them a minute earlier than you think— gooey is the goal. They'll firm as they cool, I promise.
- Let cool (!) at least 45 mins before slicing. Or don't and accept the lava situation—I can't always wait. That's life.
Things I Learned The Hard Way
- If you accidentally overbake, pop a slice in the microwave for 10 seconds. Not perfect, but it helps.
- Cake flour = fluffy brownies. All-purpose is better. (Who wants cakey brownies? I mean, really?)
- Leaving the brownies uncovered overnight makes them go a bit dry round the edges... but sometimes that’s my favourite part.
Brownie Experiments (Some Winners, Some Not So Much)
- I tried swirling in peanut butter once—total hit; my sister ate half the pan.
- Adding freeze-dried raspberries: pretty, but they went soggy. Wouldn't recommend.
- Coffee granules: game-changer for a grown-up vibe. Just a teaspoon, don’t go overboard, or it’ll taste like a coffee shop exploded.
What You’ll Need—Or Improvise!
- 9x13-inch baking dish (but I’ve jimmied two loaf pans instead; you just get more crusty edge bits—chef’s treat).
- Mixing bowl (whatever’s biggest, honestly)
- Spatula or sturdy spoon (if you’ve only got a fork, it’ll do—just takes a bit longer. Get those arm muscles working).
- An oven—duh, but I once tried making these in a toaster oven for smaller batches, and it technically worked, though don't ask about my smoke alarm...


How to Store These (If They Even Last)
Technically, airtight container at room temp, they’ll keep 3-4 days in theory. In my house, they're gone inside 24 hours, so storage is mostly a pipe dream. In summer, I pop them in the fridge, but honestly, brownies straight form the fridge are a whole different experience—firmer, but if you microwave for 7 seconds, they're like new.
Serving Ideas—What We Always Do
We swear by eating these still slightly warm with a scoop of vanilla ice cream (or soya ice cream for my cousin). Sometimes my dad insists on a splash of bourbon caramel sauce. For birthdays, candles right in the middle. Oh, and a mug of coffee, always. If you want to get fancy, pile on strawberries and a bit of whipped cream—looks impressive, little effort. Actually, if you want to distract guests from the fact that the brownies sank in the middle, serve with toppings galore; works every time.
Pro Tips (aka: Learn From My Mistakes)
- I once tried skipping the lining of the pan—never again. Too much scraping, not enough eating.
- Don’t rush the cooling, or your brownies will be lava (unless, as previously stated, that's exactly what you want).
- Using cold eggs makes the batter seize up a bit. Just run them under warm tap water for a sec if you're impatient (like me).
Real Questions I’ve Gotten (And Honest Answers)
- What if I don’t have cocoa powder? I’ve actually tried melting baking chocolate into the butter instead—just reduce the sugar a bit. Chocolate protein powder was not a win, so don’t do that.
- Can I make these gluten-free? Yep, swap in your favorite blend. My friend swears by Bob’s Red Mill 1:1, and I’ve used it once with good results. (Maybe a tad more crumbly.)
- Is it normal for the top to get all crackly? Totally, that's the good stuff. If it’s totally smooth, you probably need to beat that batter more aggressively. Or less—I actually don’t know, it just sort of happens for me.
- Can I freeze these? Sure can—slice them up, wrap individually, and pop in a freezer bag. They taste just as good on a rainy day two months later. At least according to my cousin who hid that piece (again).
Just for reference, if you want more riffs on brownies or baking science, Sally's Baking Addiction has a mega resource, and Serious Eats really gets into the nitty gritty. But honestly, this recipe is foolproof—or at least, very forgiving. Give it a whirl and let me know if your brownies even make it to the next morning; in my place, that’s almost mythical.


Ingredients
- 1 cup (225g) unsalted butter, melted
- 2 cups (400g) granulated sugar
- 1 cup (90g) unsweetened cocoa powder
- 4 large eggs
- 1 teaspoon vanilla extract
- 1 cup (125g) all-purpose flour
- ½ teaspoon salt
- 1 cup (175g) semi-sweet chocolate chips
Instructions
-
1Preheat the oven to 350°F (175°C). Grease a 9x13-inch baking pan and line it with parchment paper.
-
2In a large bowl, whisk together the melted butter, sugar, and cocoa powder until smooth and glossy.
-
3Add eggs one at a time, mixing well after each addition, then stir in the vanilla extract.
-
4Add the flour and salt, gently folding just until combined. Do not overmix. Stir in the chocolate chips.
-
5Pour the batter into the prepared pan and spread evenly. Bake for 28-32 minutes, or until a toothpick comes out with moist crumbs.
-
6Let cool completely in the pan before cutting into squares and serving.
Approximate Information for One Serving
Nutrition Disclaimers
Number of total servings shown is approximate. Actual number of servings will depend on your preferred portion sizes.
Nutritional values shown are general guidelines and reflect information for 1 serving using the ingredients listed, not including any optional ingredients. Actual macros may vary slightly depending on specific brands and types of ingredients used.
To determine the weight of one serving, prepare the recipe as instructed. Weigh the finished recipe, then divide the weight of the finished recipe (not including the weight of the container the food is in) by the desired number of servings. Result will be the weight of one serving.
Did you make this recipe?
Please consider Pinning it!!