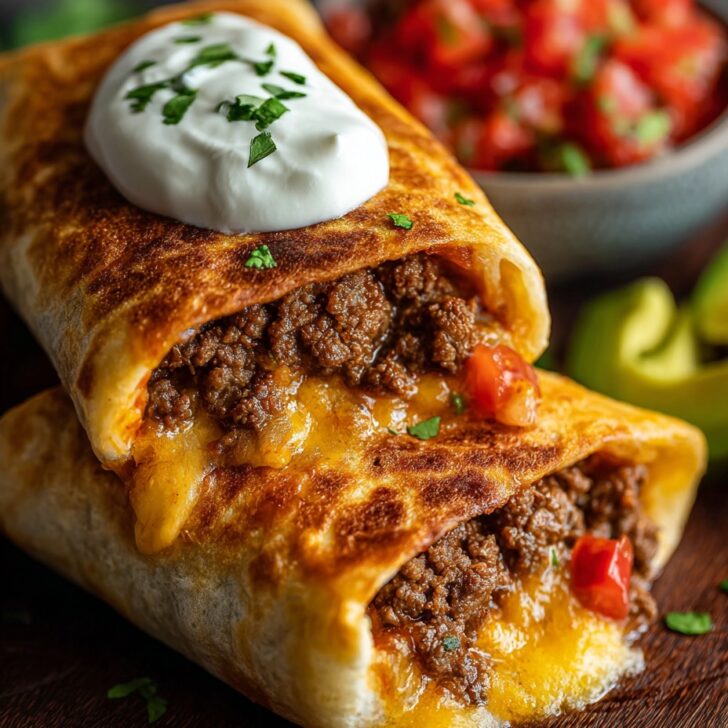
If there's one dish guaranteed to get my family racing to the table (usually before I've even put the sour cream on the counter), it's this Beef and Cheese Chimichangas recipe. The first time I tried making chimichangas, I was honestly just looking for a way to use up some sad, neglected tortillas—and, all right, I may have burned the first batch because my neighbor popped by to ask about her misdelivered package (Hi, Janet!). But after a few tweaks and a couple more, uh, crispy learning experiences, they've become my go-to whenever I want to sneak a little Tex-Mex flair onto the dinner table. It’s like a food hug with melty cheese tucked inside—a total crowd-pleaser, unless you’re on a diet, in which case... maybe make them smaller?

Why You'll Love This Chimichanga Adventure
I make these whenever I'm craving something crunchy, cheesy, and unashamedly filling (especially on lazy Fridays when nobody wants salad). My kids go wild for the oozy cheese, and honestly, they eat the beef filling right out of the bowl sometimes. You know, on days when the tortillas mysteriously vanish—probably put to better use as a superhero cape by my youngest. Plus, you can whip up the filling ahead. The only hard part is flipping them without everything falling out (and yes, that's happened, and no, the dog was not helpful).
Gathering Your Ingredients (With a Few Swaps!)
- 1 pound ground beef (or ground turkey in a crisis—it happens)
- 1 small white onion, diced (red onion works in a pinch, a shallot if you’re feeling fancy)
- 3 cloves garlic, minced (I’ve totally used the jar kind; don’t judge)
- 1 teaspoon chili powder (I sometimes sneak in smoked paprika instead)
- ½ teaspoon cumin
- ½ teaspoon dried oregano (my grandma swore by the Mexican kind, but honestly, any works)
- Salt and black pepper to taste (don’t skimp, but don’t grab the salt when you’re distracted like I once did—super salty disaster)
- 1 (8-ounce) can tomato sauce (crushed tomatoes can work, just simmer it down a bit)
- 1 (4-ounce) can diced green chiles, drained (optional, but I love the kick)
- 1 ½ cups shredded cheddar cheese (Monterey Jack is great too—sometimes I mix them up for fun)
- 6 large flour tortillas (10-inch size, but I've used whatever's lurking in the pantry—it’s forgiving)
- Vegetable oil, enough for shallow frying (canola works, olive oil if you’re truly desperate)
How to Make Beef and Cheese Chimichangas (Let's Dive In)
- Sauté the beef and veggies: In a big ol' skillet over medium-high heat, toss in the ground beef and break it up as it browns. Add the diced onion halfway through—about 5-ish minutes in—so it softens but doesn't brown too much. When most of the pink is gone, mix in the garlic and cook for about a minute more. This is when I sneak a taste (chef's privilege).
- Season and simmer: Sprinkle in the chili powder, cumin, oregano, salt, and black pepper. Stir it up until your kitchen smells amazing. Pour in the tomato sauce and green chiles, give it all a good mix, and let it bubble gently for 5 minutes—just until the flavors party together. If it gets too thick, a splash of water solves it.
- Cheese time: Haul the pan off the heat, then stir in 1 cup of the shredded cheese. The rest is for topping, if you like extra oozy bits.
- Warm up the tortillas: Either nuke them for about 20 seconds in the microwave (cover with a damp towel!) or give them a few quick flips in a dry pan. Makes them nice and bendy so they don’t tear when you roll them. I learned this the hard way—cold tortillas = unforgiving breakage.
- Assemble and roll: Dollop a generous scoop of the filling onto the lower third of each tortilla. Fold the bottom edge up over the filling, tuck in the sides, and roll it up snug as a bug. Place them seam-side down to keep things together. Don’t worry if your first one looks like a lumpy burrito—it still tastes great.
- Frying time (crunch included): Heat about half an inch of oil in a large skillet over medium heat (test with a little piece of tortilla—it should bubble on contact). Fry two chimichangas at a time, seam side down first, until golden brown and crispy—about 2-3 minutes per side. Use tongs and be brave; that sizzle is your friend. Drain them on a paper towel while you finish the rest, but good luck not nibbling on one right away.
- Final cheese flourish (optional): Sprinkle the leftover cheese over hot chimichangas if you want extra ooze. Let it melt for a minute. (Sometimes I zap the plated ones in the microwave for a cheese melt shortcut, but don’t tell anyone.)

Notes From My Messy Kitchen
- I once tried air-frying these—good crunch, but not quite the same. Still, less cleanup.
- If the filling seems runny, let it cool a bit before rolling. Otherwise, it’ll try to escape.
- You can prep the beef mixture a day in advance, which honestly makes the flavors deeper. I think they taste even better after a night in the fridge, but don't quote me.
Chimichanga Experiments—Some That Worked, Some That... Didn't
Once, I stuffed these with leftover rotisserie chicken and salsa—pretty tasty. Swapping out beef for black beans and sweet corn? Surprisingly good, though my kids begged for “the real ones” next time. I did try a version where I baked them instead of frying to cut down the mess—crispy edges but kind of chewy in the middle. Not bad if you’re on a new year’s resolution, but I prefer the oily, golden deal. Oh, and don't try with corn tortillas; they crack and fall apart (trust me).

Do You Really Need Fancy Gear?
I always use my biggest skillet for frying (sometimes I dream about a deep fryer but never actually get one). No skillet? Just use a heavy saucepan—it works. If you’re truly low on kitchen tools, I bet an air fryer or even the oven can sort of pass, but watch the timing. Also, tongs make life easy; otherwise, two big forks and some quick reflexes will do.
Can You Store These? (Not That There’s Leftovers...)
They’ll keep in a sealed container in the fridge for about 2 days, though honestly, in my house, I never see them make it past breakfast the next day—they disappear like socks in the dryer. To reheat, a few minutes in the oven keeps them crispy. The microwave works too, but expect a little sog.
How We Serve 'Em (And Who Gets the First Bite)
I like piling them up on a platter with a mountain of shredded lettuce, a sprinkle of diced tomatoes, and a massive dollop of sour cream (my son goes for salsa instead, every time). Sometimes I throw on pickled jalapeños or guac when I’m feeling extra. Birthday tradition in our house is letting the birthday kid pick their toppings—my youngest once asked for Cheetos on top... and I let him, because balance is important, right?
Hard-Earned Chimichanga Tips
- Don’t rush the beef cooking or you’ll get bland, sad filling—ask me how I know.
- If you overstuff, everything tries escaping during frying. Actually, less is more here.
- Let the fried chimichangas sit a minute before slicing or the cheese will make a run for it (and possibly burn your tongue—I may speak from experience).
Random FAQ Time (Because People Ask!)
- Can I freeze them? Totally! I wrap uncooked, assembled chimis tight in foil or plastic; then freeze. When you crave one, let it thaw and fry as you would normally. The texture is pretty close to fresh.
- What’s the best cheese for this? Cheddar is king for me, but Monterey Jack or even a blend is a close second—whatever’s on hand, honestly.
- Help! My tortilla split—what now? Patch with an extra bit of tortilla or double wrap. Happens to the best of us; just call it ‘rustic’ style.
- Can I make these vegetarian? Yup, swap the beef for a black bean and sweet potato filling—honestly, super hearty.
- Are these super spicy? Only if you go wild with the chiles. My youngest hates heat, so I skip them for his portion and sneak them into mine.
- Can I bake them instead of frying? Sure—brush lightly with oil, bake at 425°F for 20 minutes, flipping once. Not quite the same crunch, but still good.
And, just between us, if you spill filling everywhere the first time you roll a chimichanga, you’re in good company. Enjoy!
Ingredients
- 1 pound ground beef (or ground turkey in a crisis—it happens)
- 1 small white onion, diced (red onion works in a pinch, a shallot if you’re feeling fancy)
- 3 cloves garlic, minced (I’ve totally used the jar kind; don’t judge)
- 1 teaspoon chili powder (I sometimes sneak in smoked paprika instead)
- ½ teaspoon cumin
- ½ teaspoon dried oregano (my grandma swore by the Mexican kind, but honestly, any works)
- Salt and black pepper to taste (don’t skimp, but don’t grab the salt when you’re distracted like I once did—super salty disaster)
- 1 (8-ounce) can tomato sauce (crushed tomatoes can work, just simmer it down a bit)
- 1 (4-ounce) can diced green chiles, drained (optional, but I love the kick)
- 1 ½ cups shredded cheddar cheese (Monterey Jack is great too—sometimes I mix them up for fun)
- 6 large flour tortillas (10-inch size, but I've used whatever's lurking in the pantry—it’s forgiving)
- Vegetable oil, enough for shallow frying (canola works, olive oil if you’re truly desperate)
Instructions
-
1Sauté the beef and veggies: In a big ol' skillet over medium-high heat, toss in the ground beef and break it up as it browns. Add the diced onion halfway through—about 5-ish minutes in—so it softens but doesn't brown too much. When most of the pink is gone, mix in the garlic and cook for about a minute more. This is when I sneak a taste (chef's privilege).
-
2Season and simmer: Sprinkle in the chili powder, cumin, oregano, salt, and black pepper. Stir it up until your kitchen smells amazing. Pour in the tomato sauce and green chiles, give it all a good mix, and let it bubble gently for 5 minutes—just until the flavors party together. If it gets too thick, a splash of water solves it.
-
3Cheese time: Haul the pan off the heat, then stir in 1 cup of the shredded cheese. The rest is for topping, if you like extra oozy bits.
-
4Warm up the tortillas: Either nuke them for about 20 seconds in the microwave (cover with a damp towel!) or give them a few quick flips in a dry pan. Makes them nice and bendy so they don’t tear when you roll them. I learned this the hard way—cold tortillas = unforgiving breakage.
-
5Assemble and roll: Dollop a generous scoop of the filling onto the lower third of each tortilla. Fold the bottom edge up over the filling, tuck in the sides, and roll it up snug as a bug. Place them seam-side down to keep things together. Don’t worry if your first one looks like a lumpy burrito—it still tastes great.
-
6Frying time (crunch included): Heat about half an inch of oil in a large skillet over medium heat (test with a little piece of tortilla—it should bubble on contact). Fry two chimichangas at a time, seam side down first, until golden brown and crispy—about 2-3 minutes per side. Use tongs and be brave; that sizzle is your friend. Drain them on a paper towel while you finish the rest, but good luck not nibbling on one right away.
-
7Final cheese flourish (optional): Sprinkle the leftover cheese over hot chimichangas if you want extra ooze. Let it melt for a minute. (Sometimes I zap the plated ones in the microwave for a cheese melt shortcut, but don’t tell anyone.)
Approximate Information for One Serving
Nutrition Disclaimers
Number of total servings shown is approximate. Actual number of servings will depend on your preferred portion sizes.
Nutritional values shown are general guidelines and reflect information for 1 serving using the ingredients listed, not including any optional ingredients. Actual macros may vary slightly depending on specific brands and types of ingredients used.
To determine the weight of one serving, prepare the recipe as instructed. Weigh the finished recipe, then divide the weight of the finished recipe (not including the weight of the container the food is in) by the desired number of servings. Result will be the weight of one serving.
Did you make this recipe?
Please consider Pinning it!