Pull Up a Chair: My Sopaipilla Story
If you’ve never had a warm sopaipilla fresh out of the oil, you’re missing out on one of life’s delightfully messy pleasures. I first tried authentic sopaipillas at a tiny roadside place in New Mexico, during a road trip where the A/C barely worked and someone kept playing 90s country WAY too loud. Still, every bite of those golden pillows—crisp outside, fluffy inside, a bit of honey trailing down my chin—totally made up for it. (Side note: My aunt Irma tried to fit three in her purse. I respect that hustle.)

Why I Keep Coming Back to These Sopaipillas
I make this recipe whenever my family starts dropping hints like, "Remember those things you made with honey that one time?" It's a regular for chilly Sunday afternoons or when I want to look like a kitchen magician—with minimal magic, honestly. My sister claims she can eat a dozen, though I've literally never witnessed her get past eight (not for lack of trying). Oh, and if your dough ever sticks to the counter, just trust me, that drives me bananas, but a little flour fixes it up right quick.
Gathering the Ingredients (and My Odd Substitutions)
- 2 cups all-purpose flour (you could use whole wheat if you're feeling virtuous, but I never do)
- 2 teaspoons baking powder (my grandma INSISTED on Clabber Girl, but seriously, any brand is fine)
- 1 teaspoon sugar (optional, but I tend to throw it in)
- ½ teaspoon salt
- 2 tablespoons vegetable oil (some folks go with shortening—I did once, but found it too heavy)
- ¾ cup warm water (sometimes it’s a bit more, depending on my mood—or, to be honest, how I measured the flour that day)
- Oil for frying (like canola or sunflower; use what you like except olive, it tastes weird here)
- Honey or cinnamon-sugar for serving (my favorite is honey, but my brother dumps cinnamon-sugar on everything)
Let’s Make Sopaipillas (No Need for Perfection!)
- Mix up your flour, baking powder, sugar (if you’re using it), and salt in a big bowl; give it a good stir with your favorite big spoon or, if you’re like me, your hands (just wash them first!).
- Add in the oil and warm water. Watch out: sometimes I have to add an extra splash if the dough’s looking dry. Mix it up until it forms a shaggy dough. If it’s sticking to your hands like gum, toss in a bit more flour; if it’s too dry, a dab more water.
- Turn the dough out onto a floured counter and knead it—honestly, just for like 2-3 minutes, until it feels elastic. Don’t overthink it. This is where I sneak a tiny pinch to see if it tastes like, well, dough (spoiler: it will).
- Cover the dough with a clean towel, then let it rest for 20 minutes. (I wouldn’t skip this, but once I did and… yeah, just don’t. They weren’t as puffy.)
- Roll out the dough until it’s about a quarter inch thick; doesn’t have to be a geometry lesson. Odd shapes taste just as good.
- Slice dough into 3-inch squares or odd rectangles—sometimes triangles if I’m bored. This is where the kids like to "help" (usually just eating the scraps). Don’t obsess about size.
- Heat 2-3 inches of oil in a deep pot or skillet to 375°F (190°C). If you don’t have a thermometer, toss in a scrap—if it bubbles and floats, you’re ready.
- Drop a few dough pieces into the oil—not too many or, trust me, they all end up stuck together. Fry 1-2 minutes each side or until puffed and crazy golden; flip with tongs or a slotted spoon.
- Scoop them out onto a plate lined with paper towels. Try not to eat them all right away—seriously, they’re very hot.
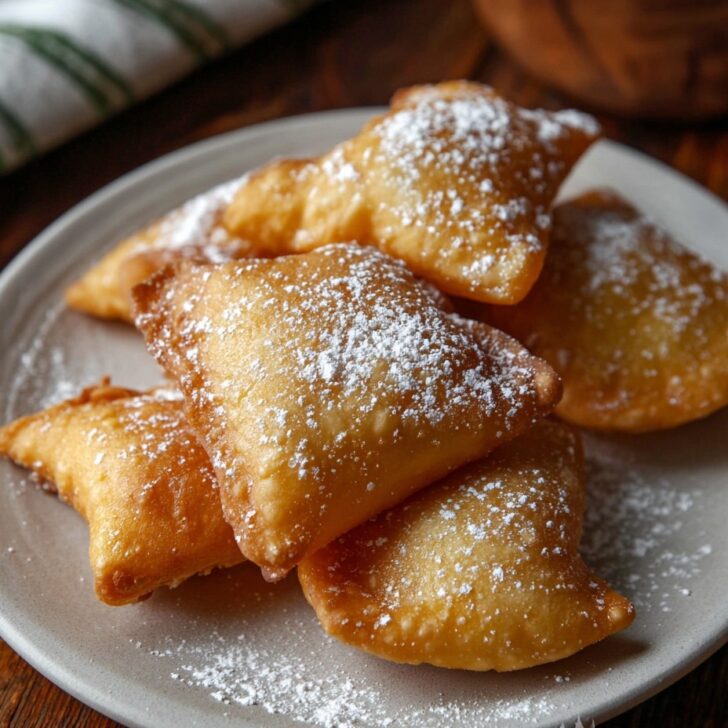
- Drizzle with honey right before you eat them or toss in cinnamon-sugar. (There’s no wrong way. In my house, honey always wins.)

Some Notes From My Sopaipilla Experiments
- If your oil’s too cool, sopaipillas get greasy instead of puffy (ask me how I know!).
- Dough scraps taste just as good, so don’t toss them—you can even fry up the little odds and ends.
- On second thought, if your first batch doesn’t puff up, pat them once with a slotted spoon; sometimes mine need a gentle nudge.
Variations I’ve Actually Tried (And One Flop)
- Swapped in buttermilk once for fun—the flavor was cool but the puff wasn’t as dramatic. Not my favorite, but maybe you’ll like it?
- I dusted some with powdered sugar too—very pretty, but everyone still reached for the honey.
- Okay, I tried making these with coconut oil. Smelled like a tropical breeze, but honestly… I missed the classic taste.

Equipment You’ll Need (And Clever Workarounds)
- Mixing bowl (or honestly, a big salad bowl works fine)
- Rolling pin—but I’ve used a wine bottle before. Worked just fine!
- Sharp knife or a pizza cutter
- Deep pan or pot for frying
- Slotted spoon (if you don’t have one, tongs or even a big fork can work—though the fork can get a bit hairy if you’re clumsy like me)
How to Store Them (Not That You’ll Need To…)
Sopaipillas are at their best right after frying, no doubt. But if you end up with leftovers by some miracle, let ‘em cool and then store in a paper-towel-lined container. They’ll be okay for a day, maybe two, though honestly, in my house anything left by morning just disappears—thieves, I tell you. Reheat in a low oven if you want a bit of the crunch back. (And, um, definitely don’t microwave if you like crispness.)
How I Love to Serve Sopaipillas
I’m all about the honey drizzle, but sometimes I set out bowls of cinnamon-sugar and a bit of jam (we get wild on birthdays). My family sometimes likes theirs as a side with spicy chili, for that sweet-savory thing. But my personal tradition? Standing over the stove, eating the first hot one with my fingers, and hoping no one’s watching.
Real-Deal Pro Tips: Lessons From Oops Moments
- Don’t rush the resting step—once I did and they turned out flatter than my neighbor’s jokes.
- If you roll the dough too thick, they puff less. But too thin and they get a bit crunchy (unless that’s what you like, go for it).
- Let the oil heat all the way up before frying. I know it takes patience—I always want to just dive in, but soggy sopaipillas are a bummer.
What Folks Have Asked Me (Actual Questions!)
Q: Can I use gluten-free flour?
A: I get this one a lot. You probably can, but I haven’t tried. (If you do, send me a note!) Just keep in mind, it’ll likely be less puffy.
Q: Do I have to use honey?
A: Nope! Try agave, maple syrup, or cinnamon-sugar. Heck, eat them plain if you like—they’re still tasty.
Q: Can I freeze sopaipillas?
A: Never done it, but a friend claims it works if you freeze right after frying then crisp up in a hot oven. I just… never have leftovers to try.
Q: The dough feels sticky… help?
A: Happens to me too! Just add flour little by little while kneading—don’t go crazy though.
Q: Any way to make these ahead?
A: You can mix and rest the dough, then refrigerate a few hours before frying. But nothing beats ‘em fresh, honestly.
If you make these, I’d love to hear how yours turn out. Or what chaos ensued in your kitchen—I’ve probably seen worse!
Ingredients
- 2 cups all-purpose flour (you could use whole wheat if you're feeling virtuous, but I never do)
- 2 teaspoons baking powder (my grandma INSISTED on Clabber Girl, but seriously, any brand is fine)
- 1 teaspoon sugar (optional, but I tend to throw it in)
- ½ teaspoon salt
- 2 tablespoons vegetable oil (some folks go with shortening—I did once, but found it too heavy)
- ¾ cup warm water (sometimes it’s a bit more, depending on my mood—or, to be honest, how I measured the flour that day)
- Oil for frying (like canola or sunflower; use what you like except olive, it tastes weird here)
- Honey or cinnamon-sugar for serving (my favorite is honey, but my brother dumps cinnamon-sugar on everything)
Instructions
-
1Mix up your flour, baking powder, sugar (if you’re using it), and salt in a big bowl; give it a good stir with your favorite big spoon or, if you’re like me, your hands (just wash them first!).
-
2Add in the oil and warm water. Watch out: sometimes I have to add an extra splash if the dough’s looking dry. Mix it up until it forms a shaggy dough. If it’s sticking to your hands like gum, toss in a bit more flour; if it’s too dry, a dab more water.
-
3Turn the dough out onto a floured counter and knead it—honestly, just for like 2-3 minutes, until it feels elastic. Don’t overthink it. This is where I sneak a tiny pinch to see if it tastes like, well, dough (spoiler: it will).
-
4Cover the dough with a clean towel, then let it rest for 20 minutes. (I wouldn’t skip this, but once I did and… yeah, just don’t. They weren’t as puffy.)
-
5Roll out the dough until it’s about a quarter inch thick; doesn’t have to be a geometry lesson. Odd shapes taste just as good.
-
6Slice dough into 3-inch squares or odd rectangles—sometimes triangles if I’m bored. This is where the kids like to "help" (usually just eating the scraps). Don’t obsess about size.
-
7Heat 2-3 inches of oil in a deep pot or skillet to 375°F (190°C). If you don’t have a thermometer, toss in a scrap—if it bubbles and floats, you’re ready.
-
8Drop a few dough pieces into the oil—not too many or, trust me, they all end up stuck together. Fry 1-2 minutes each side or until puffed and crazy golden; flip with tongs or a slotted spoon.
-
9Scoop them out onto a plate lined with paper towels. Try not to eat them all right away—seriously, they’re very hot.
-
10Drizzle with honey right before you eat them or toss in cinnamon-sugar. (There’s no wrong way. In my house, honey always wins.)
Approximate Information for One Serving
Nutrition Disclaimers
Number of total servings shown is approximate. Actual number of servings will depend on your preferred portion sizes.
Nutritional values shown are general guidelines and reflect information for 1 serving using the ingredients listed, not including any optional ingredients. Actual macros may vary slightly depending on specific brands and types of ingredients used.
To determine the weight of one serving, prepare the recipe as instructed. Weigh the finished recipe, then divide the weight of the finished recipe (not including the weight of the container the food is in) by the desired number of servings. Result will be the weight of one serving.
Did you make this recipe?
Please consider Pinning it!