
The Story Behind This Mousse (and Why It Matters to My Sanity)
Alright, let me set the scene. It's a Tuesday night. Work's been bonkers (again), fridge is looking a bit sad, and I've got a craving for something chocolaty but the whole "eat more protein" thing is buzzing like a bee in my head. Enter: this high protein cottage cheese chocolate mousse. First time I made it, my blender threw a tantrum, I splattered cocoa up the wall (pro tip: always put the lid on), and yet — my whole family hovered around the bowl like seagulls at the beach. Seriously, I never thought anything with cottage cheese would cause an actual stampede at dessert time! And hey, just once, I managed to sneak a spoonful before it totally vanished. Small wins, eh?
Why I Keep Making This (Even When I'm Not Paying Attention)
I make this when I've got half a tub of cottage cheese left and zero patience for fancy pudding. My family goes mad for this because it tastes downright decadent, but it's secretly healthy (well, healthier-ish). If only you could’ve seen my eldest’s face the first time I told her what was in it. I mean, she made that full-on "ick" look… until two bites later when she was guarding her bowl like a dragon. Also, I never have to stress about baking or eggs going rogue or anything setting up weird. If you’re ever trying to impress someone with very little actual effort, this is perfect. Or just, y’know, impress your dog. (Though probably don’t feed it to him. Choc’s no good for dogs.)
What You'll Need (And What I Toss In When I'm Out of Stuff)
- 1 ½ cups (about 340g) cottage cheese (full-fat makes it creamier, but sometimes I just grab whatever’s lurking in the back of the fridge. My grandmother swore by Daisy brand—honestly, any will do)
- 3-4 tablespoons unsweetened cocoa powder (dark cocoa is my jam, but I’ve used regular in a pinch—just tastes a bit less punchy)
- 2-4 tablespoons maple syrup OR honey (depends how sweet you like it; sometimes I sub in a scoop of vanilla protein powder instead and use less syrup—experiment if you’re feeling wild)
- 1 teaspoon vanilla extract (or you can go rogue and use almond)
- A pinch of salt (important! Don't skip)
-
Optional extras:
- Handful of chocolate chips on top
- Spoonful of Greek yogurt for added tang—try it
- I once tossed in a little espresso powder; honestly, not sure if it made much difference or if I just wanted to feel fancy
Okay, Let's Make This Mousse (No Stress)
- Scoop the cottage cheese into a high-speed blender or food processor. No need to be precious about it—just dump it in.
- Add the cocoa powder, syrup/honey, vanilla, and salt. I usually just eyeball the syrup, tasting as I go, but maybe measure if you want to be proper.
- Blitz everything together until really smooth. This might take a couple minutes. Stop and scrape down the sides. Actually, I find it works better if you blitz in short bursts—prevents the blender getting all warm and weird.
- Taste and adjust for sweetness. This is where I usually sneak a taste. If it’s too thick, a splash of milk (or, heck, water) helps.
- Transfer to small bowls or glasses. If you want it extra luxurious, chill for an hour. Or just eat it straight away. No judgement.
- Top with chips, berries, or whatever else you fancy.
A Few Things I Learned the Hard Way (Notes & Honest Messes)
- Cottage cheese: Blending is key. The first time, I tried mashing by hand—nope. Lumpy chocolate mousse is not a vibe.
- If you oversweeten it (been there), just stir in a bit more cocoa to balance it out.
- For a super light texture, fold in some whipped cream. Or don't, if you can’t be bothered. It’s still good.
Variations I've Actually Tried (Some Good, Some... Not)
- Chili powder: Adds a sneaky kick. Good, but maybe not kid-friendly.
- Banana blended in: Tastes almost like pudding, but it does mess with the texture (kind of mushy—won’t lie).
- Vegan attempt with tofu: Honestly, didn’t love it. But hey, maybe you’ll have better luck?
Do You Really Need a Blender?
Look, a blender or food processor does make life easier (I swear by my Vitamix but use what you have). In a pinch (and once when camping out at my mum's place), I've used a stick blender. Just, try not to fling mousse everywhere. If all else fails, you could pass it through a sieve for ultra-smoothness, but that's a faff...


Keeping It (Or, Let's Be Honest, Not Keeping It)
This mousse will keep in the fridge for about 2 days in a sealed container. Though honestly, in my house it never lasts more than a day! Once, I thought I’d have leftovers for breakfast, but wishful thinking. If you want to make ahead, just give it a quick stir before serving as it can separate a little.
How We Serve It (Your Mileage May Vary)
I love serving this with a few berries and a little pinch of sea salt on top. My youngest likes it with granola (go figure). If we're feeling posh—rare but delightful—I’ll swirl in a spoon of peanut butter. Or sometimes just straight form the bowl, no judgment here.
Pro Tips I Learned by Messing It Up
- Don’t try to rush the blending step. One time I got impatient and my mousse was, well, bumpy. Not the good kind of rustic.
- Let it chill. I once thought I’d prefer it fresh, but actually, I find it works better if it sits in the fridge for a bit.
Some Burning (or Melting?) Questions People Have Asked Me
- Isn’t cottage cheese in dessert kinda weird? Short answer: it sounds odd, but honestly, it doesn’t taste "cheesy" at all – magic of cocoa, I guess. The texture gets super smooth after blending. Creamy, not lumpy!
- Can you freeze this? You probably *could*, but it’d get icy. I did try once, and it separated after thawing. Can’t say I’d recommend unless you like odd textures.
- Any way to make this more filling? Try stirring in a bit of protein powder. Or top with nuts! Sometimes I crumble in a protein bar if I’m feeling like a proper athlete (which is, let’s be real, rare).
- Why is my mousse sad and grainy? Usually just needs more blending. Or (happened to me!) using low-quality cottage cheese, which didn’t really smooth out. Also, check if your cocoa is too old—one day I realized mine was practically fossilized; fresh cocoa is best.
- Is this kid-approved? Well, mine think it’s fancy pudding, and if you don’t spill the beans about the cottage cheese, they’re none the wiser. If they catch you with the blender, though... good luck explaining.
- Where can I get good cocoa powder? I’ve tried lots, but King Arthur’s black cocoa is amazing (not sponsored, I just love it). For everyday stuff any brand will do, but treat yourself if you can.
And now, my traditional digression: last time I made this, I dropped the vanilla, the dog barked, and I found a lost Lego in the cutlery drawer. Is that a sign my kitchen needs a clean, or just that good things—like this mousse—usually happen in the middle of life's charming chaos? I'll leave the cleaning for tomorrow. Or next week. Maybe.


Ingredients
- 1 ½ cups cottage cheese (low-fat or full-fat)
- 3 tablespoons unsweetened cocoa powder
- 3 tablespoons maple syrup or honey
- ½ teaspoon pure vanilla extract
- ¼ cup dark chocolate chips, melted (optional)
- ⅛ teaspoon salt
- 1 tablespoon milk (dairy or plant-based, as needed)
- Fresh berries or shaved chocolate for garnish
Instructions
-
1In a food processor or high-speed blender, add cottage cheese, cocoa powder, maple syrup, vanilla extract, and salt.
-
2Blend until perfectly smooth and creamy, scraping down the sides as needed.
-
3If the mousse is too thick, add milk one tablespoon at a time and blend until you reach desired consistency.
-
4For extra chocolate flavor, blend in the melted dark chocolate chips until fully combined.
-
5Spoon the mousse into serving dishes. Chill in the refrigerator for at least 30 minutes for best texture.
-
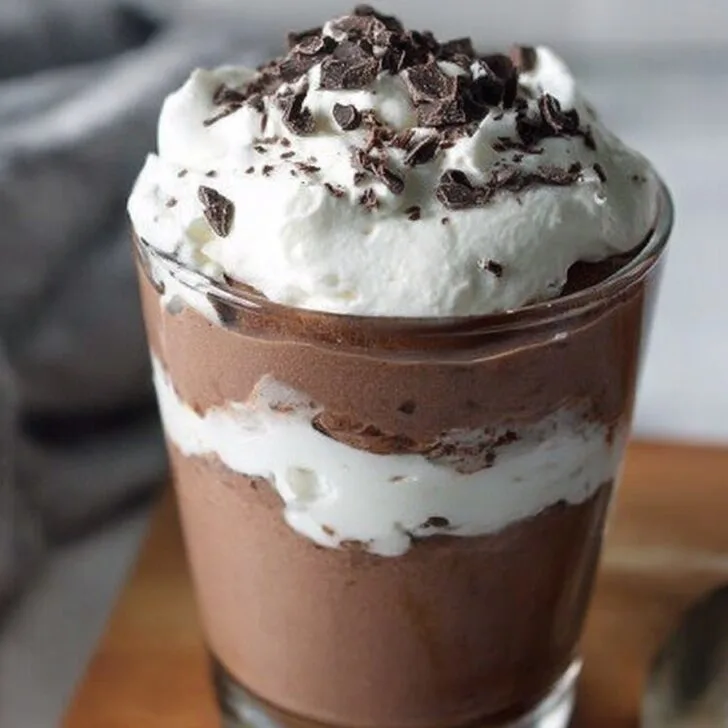
6Garnish with fresh berries or shaved chocolate before serving.
Approximate Information for One Serving
Nutrition Disclaimers
Number of total servings shown is approximate. Actual number of servings will depend on your preferred portion sizes.
Nutritional values shown are general guidelines and reflect information for 1 serving using the ingredients listed, not including any optional ingredients. Actual macros may vary slightly depending on specific brands and types of ingredients used.
To determine the weight of one serving, prepare the recipe as instructed. Weigh the finished recipe, then divide the weight of the finished recipe (not including the weight of the container the food is in) by the desired number of servings. Result will be the weight of one serving.
Did you make this recipe?
Please consider Pinning it!!